
|
|
|
#1
 07-16-2009, 09:40 PM
|
||||
|
||||
|
A How to Post Images to XMS tutorial brought to you by Donziikid. Prefix: There have been a lot of questions on how to post images here lately on Xmodsouce.com and there hasnt been a written way on how to do so in a while; most of them have been lost in cyberspace. This is a tutorial that will show you how to upload, update and post images to your threads on Xmodsource.com using Photobucket.com. Photobucket is one of the most renown image hosting sites in the world with over billions of users and images. This is a place where you can host, store and link images to forums, MySpace and other great places that the world public likes to use. I will be using Photobucket.com to show you how to link images to your posts/threads here on Xmodsource.com 1. Getting Started: First, if you do not already have an account at Photobucket.com you must create one. This is quite simple to do; just go to their homepage (www.photobucket.com) and in blue menu bar you will see a clickable link that says Join Now. If you cannot find this link, it may be moved to the upper right hand corner of the browser screen. Click that link and follow the instructions on how to create an account using their software. The Menu:  Once you have created your account and activated it you may log in and start to use your account. Take a look around and see what you can do with certain options and things. In my opinion they have actually made it a quite simple site compared to other image hosting sites. 2. Using Your Profile: Back on what I like to call your homepage (the first page once you log-in) there are a few options. You can either start to upload your images right then and there, or, you can choose to create what Photobucket calls their sub-albums. I like to create sub-albums because it keeps everything neat and organized; also a lot easier to go back and find an image if you know where it is! As you can see, I already have many sub-albums on my Photobucket. How To Create a Sub-Album: 1. Scroll down until you see the add a new album box. 2. Type in the desired name for this Sub-Album you are creating. You may use up to thirty-six (36) alpha-numerical letters/numbers. However, you may not use grammatical punctuation like commas, periods and exclamation marks. Dashes are allowed to be used. 3. After you have typed in the desired name you would like for that album click the BLUE save button. This will save the album for you to use and store uploaded images. 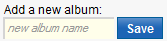 Navigating Your New Sub-Album: After clicking the BLUE save button (step 3 above) the page should automatically reload brining you into that newly created album. The first clickable URL/link marked with a RED box is the clickable URL/link to your main homepage and the second clickable URL/link marked with a BLUE box is the clickable URL/link that will refresh the page you are currently on. Your homepage is ALWAYS first, no matter how many clickable URL/links there are.  How to Upload an Image: Before uploading anything to your Photobucket profile you must select the desired size you would like your image to be uploaded at maximum. There is a quick drop down box that allows you to do so. Simple click the arrow on the right to open the drop down box and select your desired size.  Please bear in mind that Xmodsource.com Rules require that ALL images posted within [IMG] tags are no larger than 800x600px. This will be further explained below. 800x600px has been highlighted in blue for easy viewing. 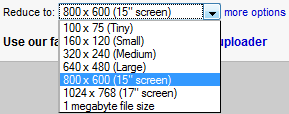 Images that are smaller than the desired size will be uploaded at their maximum resolution. They will not be stretched or skewed to meet the maximum size allowed to be uploaded (a 600x600 image will not be stretched or skewed to 800x600 if the 800x600 max. size is selected). However, images larger than the max. size allowed to be uploaded will be shrunk to meet those requirements in square ways. A 1200x600 image will be uploaded at a maximum size of 800x400 keeping it square because everything will need to be divided by 1.5 sizes. 1. Click the blue box labeled Choose Files in the upload images window pane. 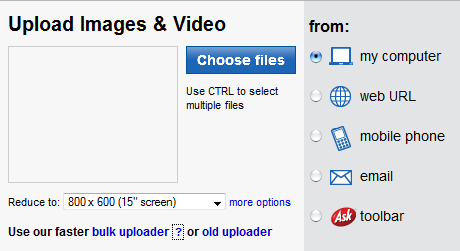 2. Clicking this will open up a new window, seen directly below. 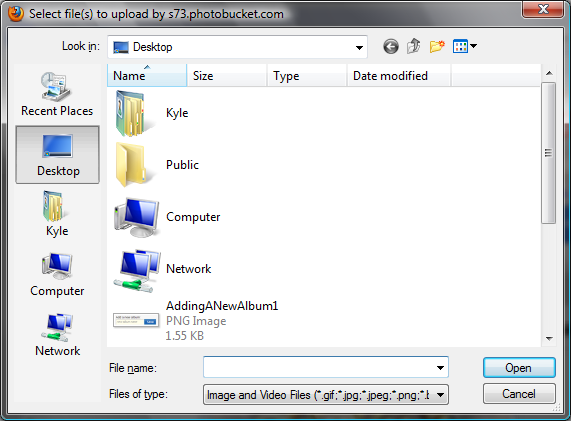 3. Within that opened window you can view all electronic image and video files that Photobuckets hosting services will support. I have yet to run across any file type that Photobucket will not host! From here you navigate to the desired image and highlight it. 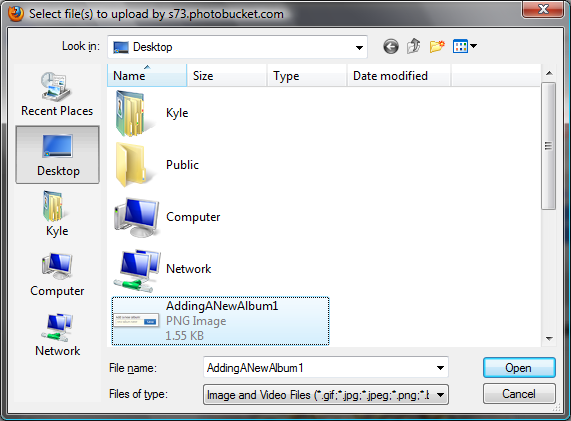 4. After highlighting the desired image press Open in the bottom right hand corner of that window. Open has been surrounded by a RED box below. 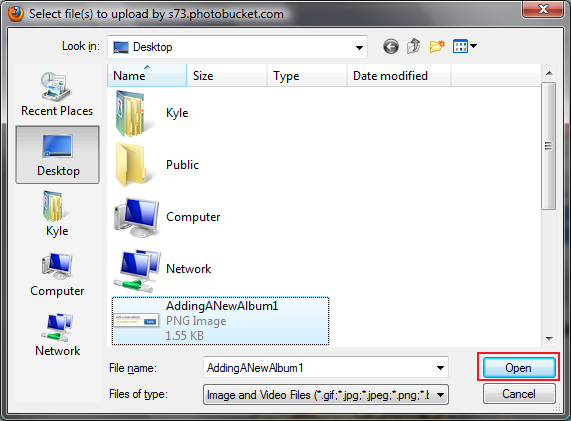 5. By clicking Open the image will be uploaded to your Profile. If the file size is large enough a loading bar will be displayed while uploading the image, seen below. 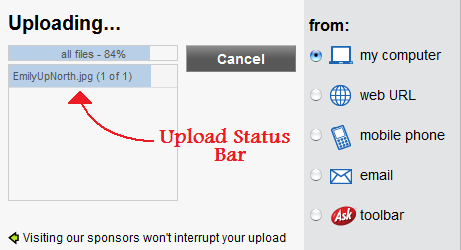 6. After the image has finished uploading the page will refresh bringing you to a new one. This new page is the Tags page. Personally, I dont like to add tags unless the image is really, really important. However, if you would like to add Tags you must enter a Title, a Description, Tags and places to be Shared. After entering the information you must click the Return to Album to refresh your sub-album with the newly uploaded images. 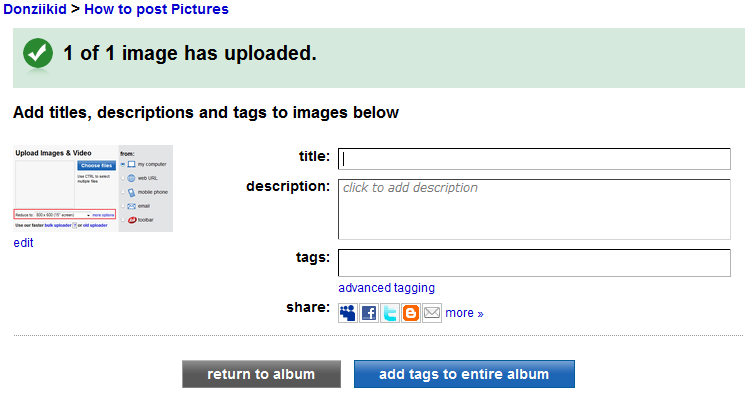 Posting Images on Xmodsource: Congratulations! If you followed the above steps correctly you have successfully uploaded an image onto your new Photobucket account! Now comes the fun part; linking it into your thread/posts here on the forum. Most modern web browsers now offer the ability to have tabs which makes this linking and posting bit much, much easier. First, open up the thread here on Xmodsource you would like to link images to. Next, open a new tab and locate the image you would like to link to. Generally the page will look like the following: 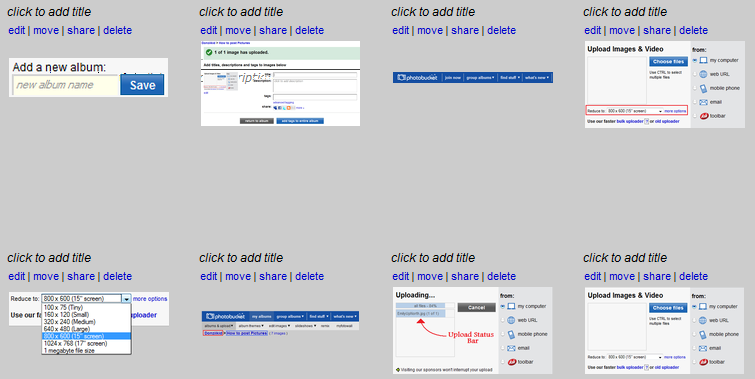 I see no links, no addresses and no ways to link to your images! Well, Photobucket has a tricky way of hiding these things to keep it cleaner looking. Simple hover your mouse over the desired image you wish to link to and click the appropriate link!  By inserting what Photobucket calls a Direct link you will be inserting something that looks like this: http://www.photobucket.com/donziikid...rum/image1.jpg That is something that will not automatically show up within your forum post. That is just a direct link to an image. That link, by the way, is an invalid link. So, if you clicked it, blank page/page not found, haha.. To make an image automatically show up in your post you need to post it within forum tags. These tags are what allows an image to automatically show up on your browser. The proper tags for images on Xmodsource are: [IMG] or [img] before the image URL and [/IMG] or [/img] after the URL. It will look something like this: Code:
[IMG]www.photobucket.com/donziikid/subforum/image1.jpg[/IMG] Code:
[img]www.photobucket.com/donziikid/subforum/image1.jpg[/img] Now, Photobucket takes things a step further and does this all for you. All you need to do is hover over you desired image to show the options (shown above) and click the IMG Code box. Many browsers will automatically highlight and copy the code for you, but I often find myself pressing CTRL + C just as backup. 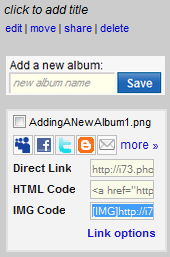 After the IMG Code has been copied switch to your New Post tab for the desired forum and follow this procedure: 1. Type your post until the desired place you want your image placed is reached. Copy the IMG Code from Photobucket and paste it into your Message box. 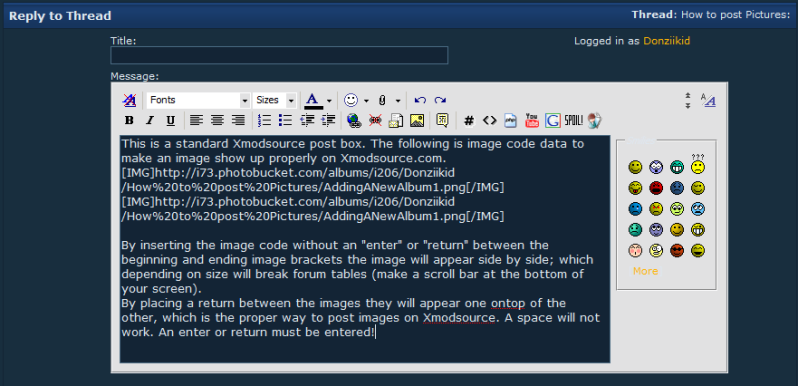 2. To enter images rule abidingly on Xmodsource there must be an ENTER or RETURN between the beginning ([IMG]) and ending ([/IMG]) brackets. Failure to insert an ENTER or RETURN will result in the images being placed side by side; depending on the size of the file (if it is any larger than 350px wide for both images or adds up to more than 800px wide) it will break forum tables. You know you have broken the forum tables when a scroll bar is created at the bottom of your screen. Code placed like this: [/IMG][IMG] will be placed side by side. Code placed like this: [/IMG] [IMG] will be stacked on top of each other and not break forum tables (as long as the entire width of your image does not exceed 800px). 3. Follow the above procedure for each picture to successfully place them within your posts. IMG Code and Direct Link are the only two codes that will work properly on Xmodsource. Unlike MySpace, Twitter, etc, Xmodsource does not offer the ability to use <href> brackets. Any <href> code will be viewed as code, not as an image. This is a common mistake, so please do not use </> brackets. They only make good smiley faces. >.> <.< >.< <.> Youre done. Now, preview your post to make sure it is in the spot you want it to be in, and post your thread/post! Youve successfully pasted an image into your post without some funky unknown code that will not work! Cheers, Donzii/Kyle.
__________________
XMS Rules & Guidelines | B/S/T Rules | How To Post Pictures Greyscale Racing Member
 The Collection: Mitsubishi Pajero | AE RC18MT TLMicroCrawler | Xmod ShowRoom | 'Yota XTruck "The fun begins when the pavement ends." 
|
 |
| Currently Active Users Viewing This Thread: 1 (0 members and 1 guests) | |
|
|


 Linear Mode

