Go Back   XmodSource.com > Mini & Micro > Mini & Micro Projects
Register FAQ Members List Calendar Gallery iTrader Today's Posts

Reply
 
Thread Tools Display Modes
  #1  
Old 07-23-2010, 12:00 PM
Dr. Kustom Dr. Kustom is offline
aka xmod4life
 
Join Date: Aug 2007
Location: New York
Posts: 1,083
Trader Rating: (9)
Send a message via AIM to Dr. Kustom Send a message via MSN to Dr. Kustom
Default - Project R32 -

A new project from me again! This time finally a Skyline GT-R R32!!! Just got this body last night, plan for this is to clean it up a bit, fill up the holes on the body, going wingless, and a wide body kit.


__________________
Reply With Quote
  #2  
Old 07-23-2010, 01:44 PM
GearHeadV8's Avatar
GearHeadV8 GearHeadV8 is offline
Subaru Nut
 
Join Date: Jan 2008
Posts: 1,117
Trader Rating: (7)
Default

ha i bet your exited! is this from the same guy?
__________________
Quote:
Originally Posted by texan_idiot25 View Post
You need to get your stupid checked.
Quote:
Originally Posted by Donziikid View Post
You can't fix stupid.
MY TUTORIALS
SNOW PLOW
HUMMER DROP HITCH
DULLY TIRE TUT
Reply With Quote
  #3  
Old 07-23-2010, 07:19 PM
WhiteCharisma's Avatar
WhiteCharisma WhiteCharisma is offline
Drift maniac
 
Join Date: Jan 2009
Location: Rochester, MN
Posts: 151
Trader Rating: (7)
Default

alright another R32 project!!! Can't wait til this one's done.... curious though, that lip is on a lot of your cars, its screwed onto the chassis right? Think we could get a pic of the lip? It looks great I seem to see it on your R32's frequently....
__________________
Patience and careful work brings great results in Xmodding and life.

Team X.I.
Reply With Quote
  #4  
Old 07-23-2010, 07:56 PM
Dr. Kustom Dr. Kustom is offline
aka xmod4life
 
Join Date: Aug 2007
Location: New York
Posts: 1,083
Trader Rating: (9)
Send a message via AIM to Dr. Kustom Send a message via MSN to Dr. Kustom
Default

Quote:
Originally Posted by GearHeadV8 View Post
ha i bet your exited! is this from the same guy?
Very excited! Yea I it from the him, keep your eyes on my gallery, new family member will show up tomorrow night.

Quote:
Originally Posted by WhiteCharisma View Post
alright another R32 project!!! Can't wait til this one's done.... curious though, that lip is on a lot of your cars, its screwed onto the chassis right? Think we could get a pic of the lip? It looks great I seem to see it on your R32's frequently....
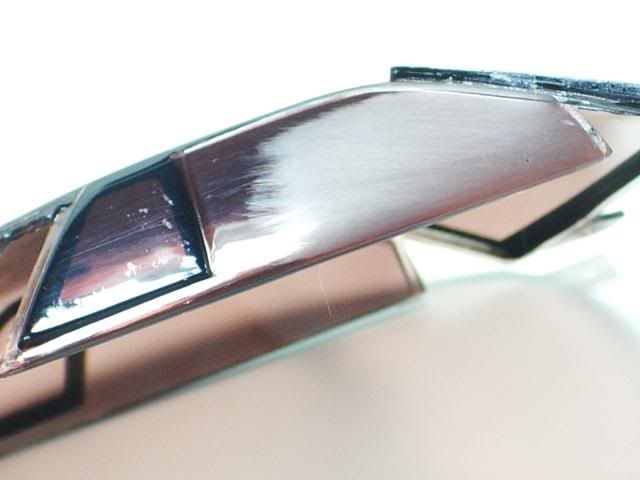
Thanks WC! Yea, that lip is the one I created a long time ago (I believe it was last year) its getting pretty beat up now. I've used it on a few cars, its screw on to the chassis, it direct fit to the RX-7 FD, R32 and the GT-R.

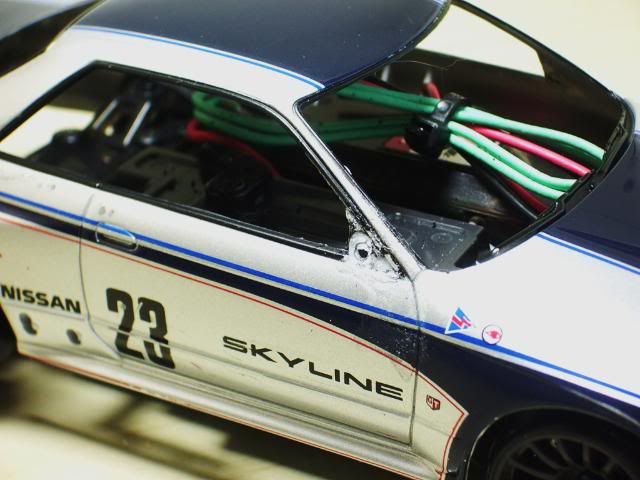
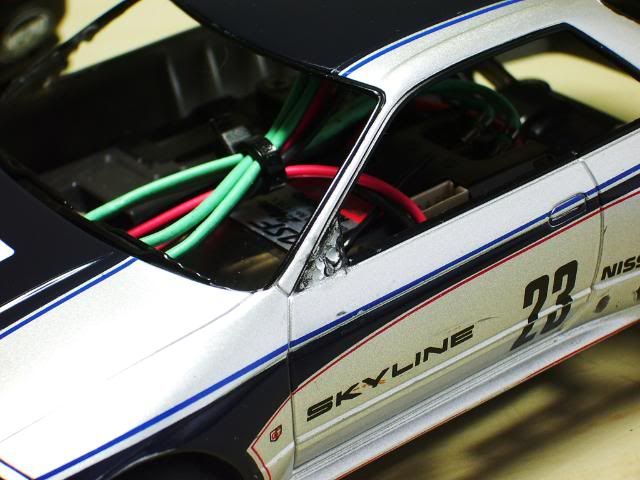
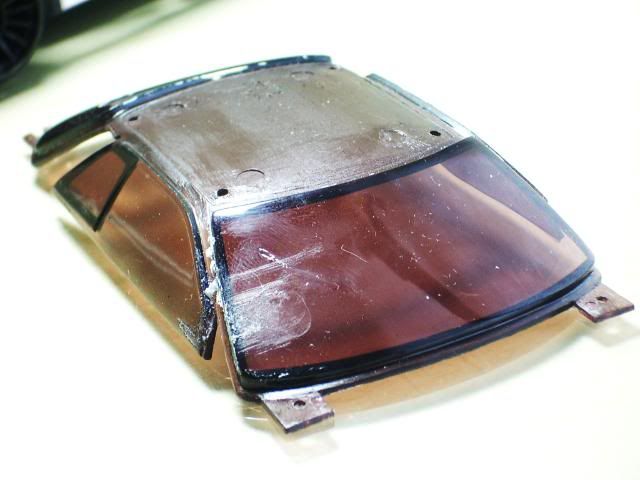
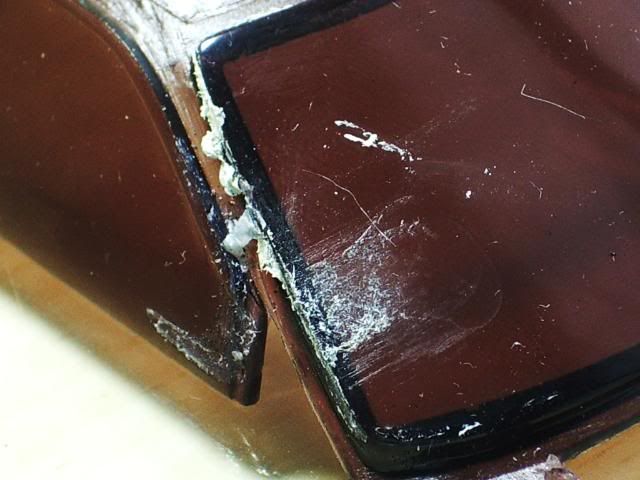
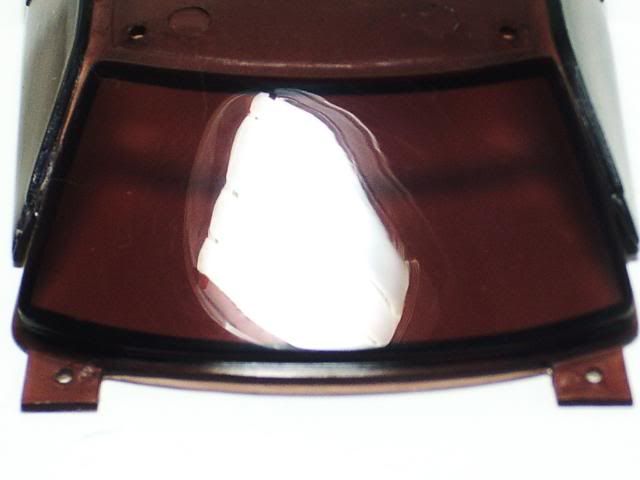
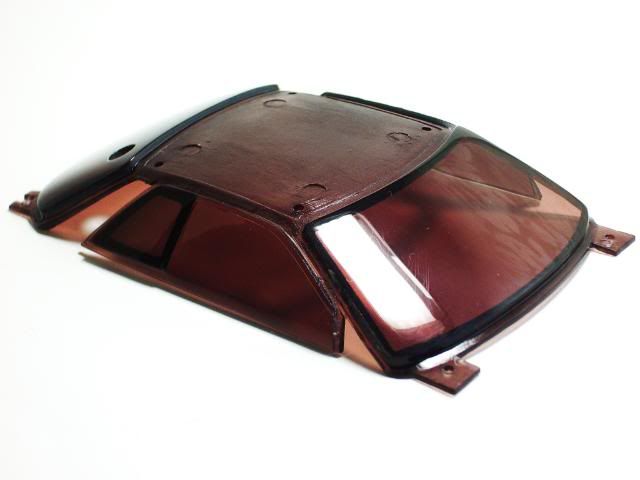
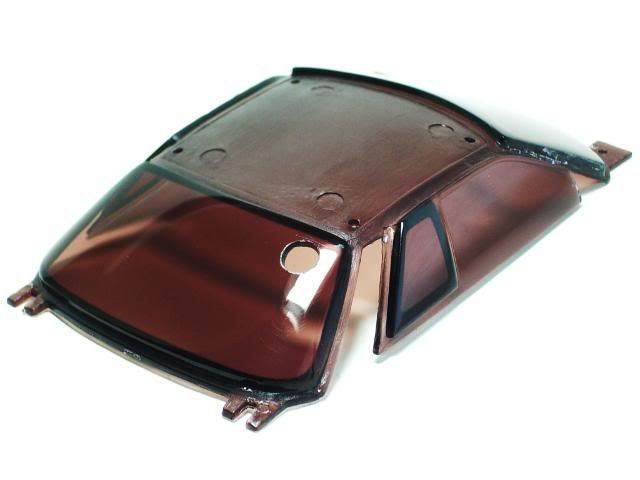
Update: Windows repaired.


__________________
Reply With Quote
  #5  
Old 07-23-2010, 07:57 PM
theoriganalRiD3R1967's Avatar
theoriganalRiD3R1967 theoriganalRiD3R1967 is offline
zzzzzzzzzzzzzzzzzzzzzzzzz
 
Join Date: Jan 2008
Location: Vancouver
Posts: 736
Trader Rating: (0)
Default

Yikes, that windsheild looks like its in bad shape! Those black rims are wicked too

EDIT: I guess you fixed it before i finished my post

Last edited by theoriganalRiD3R1967; 07-23-2010 at 08:12 PM..
Reply With Quote
  #6  
Old 07-23-2010, 08:10 PM
Kot Kot is offline
Hakosuka Love
 
Join Date: May 2009
Posts: 244
Trader Rating: (5)
Default

D*mn, doc. what do you do with those windows again? sand with ____ grit, and clear?

I'm envious when it comes to your paint and detailing skills. >
__________________
Reply With Quote
  #7  
Old 07-23-2010, 10:17 PM
WhiteCharisma's Avatar
WhiteCharisma WhiteCharisma is offline
Drift maniac
 
Join Date: Jan 2009
Location: Rochester, MN
Posts: 151
Trader Rating: (7)
Default

Quote:
Originally Posted by Flipsoulja View Post
D*mn, doc. what do you do with those windows again? sand with ____ grit, and clear?

I'm envious when it comes to your paint and detailing skills. >
I was about to ask....I had no idea you could restore clear plastic like that. Might you enlighten us on your Mr. Fix it skills?
__________________
Patience and careful work brings great results in Xmodding and life.

Team X.I.
Reply With Quote
  #8  
Old 07-23-2010, 11:23 PM
Dr. Kustom Dr. Kustom is offline
aka xmod4life
 
Join Date: Aug 2007
Location: New York
Posts: 1,083
Trader Rating: (9)
Send a message via AIM to Dr. Kustom Send a message via MSN to Dr. Kustom
Default

Thanks guys! It was my first time attempting to restoring the Mini-Z windows.

Here's the steps on how I did it:

1.) Take the windows off the body carefully using a hobby knife to trim out the melted tabs that holds the windows in place.

2.) Once you got the windows out, wash it with water and soap, also use a tooth brush to help cleaning it. (You must wash it before start the sanding process, because you don't want to start sanding while there's dirt/dust on the windows, this will causes you windows to have deep scratches that are hard to get rid, because basically you are sanding the windows with the dirt/dust.)

3.) Now the sanding part. First you'll need to use 4 different grit of sandpapers that are made by 3M; included 400, 600, 1500 and 2000. In the windows restoring process, only sand the windows using wet sanding. This will help the windows to have a smoother surface compare to dry sanding. Start with 400 grit, then follow by 600 grit, then 1500 grit, and finally 2000 grit.

4.) After the wet sand is done, repeat step 2 again.

5.) Once the windows are cleaned. Then you can move on to the "polish" part. I used the rubbing compound that made by 3M. Apply a small drop of rubbing compound on the window, work on a small area at one time, then use a clean cloths to rub the rubbing compound in a circle motion till the compound starting to get dry, then use a clean side of cloths to repeat the step for about 2 times.

6.) Last, repeat step 2 again. Then wipe it down with a clean dry cloths. Then you will have a brand new windows for your Mini-Z.
__________________
Reply With Quote
  #9  
Old 07-25-2010, 09:16 PM
Dr. Kustom Dr. Kustom is offline
aka xmod4life
 
Join Date: Aug 2007
Location: New York
Posts: 1,083
Trader Rating: (9)
Send a message via AIM to Dr. Kustom Send a message via MSN to Dr. Kustom
Default

Update: The after math of drifting...


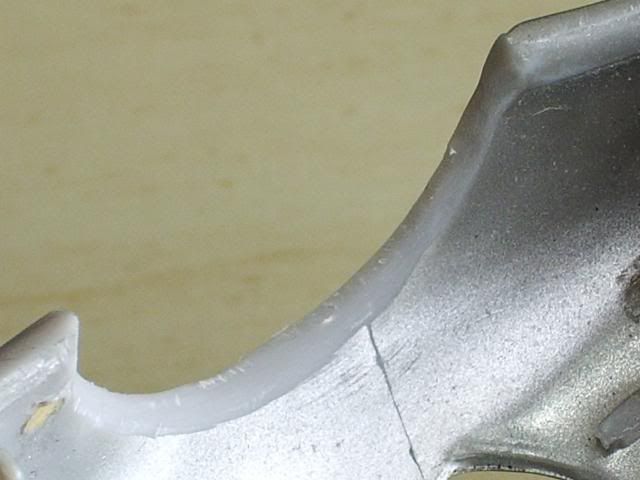
Okay, now lets move on to the real update! Filled up the holes with putty, smoothed them out.


And here's the goal.
__________________
Reply With Quote
  #10  
Old 07-25-2010, 10:31 PM
WhiteCharisma's Avatar
WhiteCharisma WhiteCharisma is offline
Drift maniac
 
Join Date: Jan 2009
Location: Rochester, MN
Posts: 151
Trader Rating: (7)
Default

Whoa where were your drifting.....the car got so dirty! LOL Nice work on touching up the body. Thats amazing how little putty you need. Do you use your fingers or a tool cause it looks like you apply it so smooth. The end product looks insane. That R32 looks amazing, good luck! With your skills it should be a cake walk compared to your other projects
__________________
Patience and careful work brings great results in Xmodding and life.

Team X.I.
Reply With Quote
  #11  
Old 07-26-2010, 12:34 AM
Kaze Kaze is offline
...
 
Join Date: Jan 2007
Posts: 601
Trader Rating: (15)
Send a message via AIM to Kaze
Default

generally handling putty (i believe Dr.K uses the same process i'm about the describe) you want to keep your fingers wet. The water helps create a film around your hands that won't let the putty stick to it, it also gets absorbed by the putty while you're working with it making it take a bit longer to start drying.

Typically you want that extra time the water gives you to shape it out however you want, you can keep going over it with a wet finger, or a wet flat piece of styrene or w/e you want to use to essentially press it down or shape it. Once again the water will let you do that without it sticking to you or the object you use. Once you're happy with it let it sit and dry and bam minimal sanding/shaping required.
__________________


Reply With Quote
  #12  
Old 07-26-2010, 05:26 PM
Dr. Kustom Dr. Kustom is offline
aka xmod4life
 
Join Date: Aug 2007
Location: New York
Posts: 1,083
Trader Rating: (9)
Send a message via AIM to Dr. Kustom Send a message via MSN to Dr. Kustom
Default

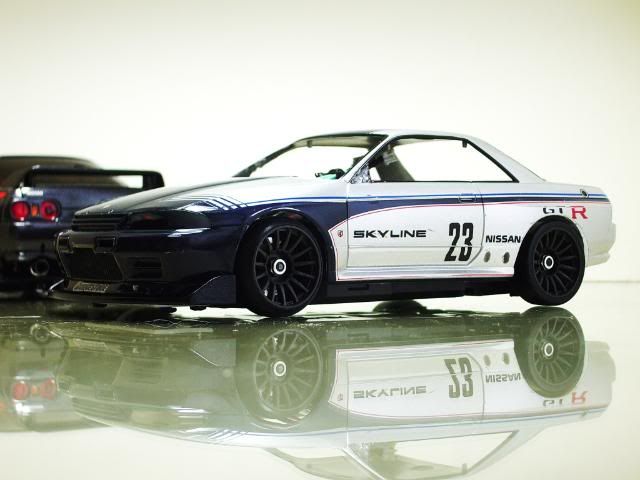
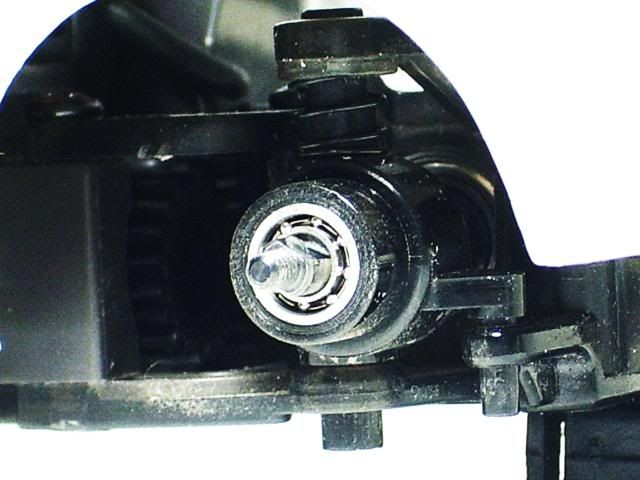
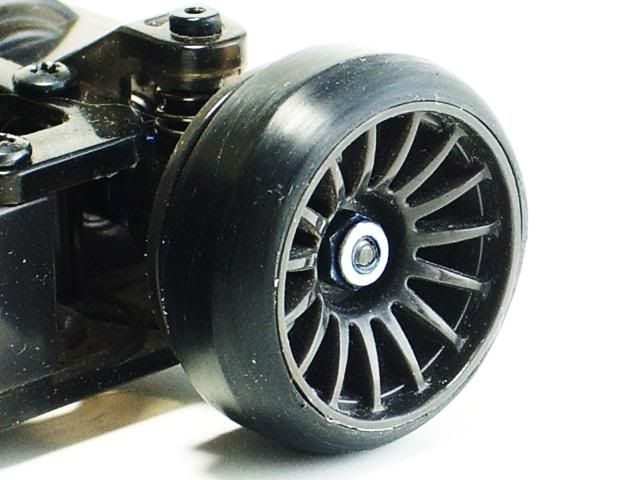
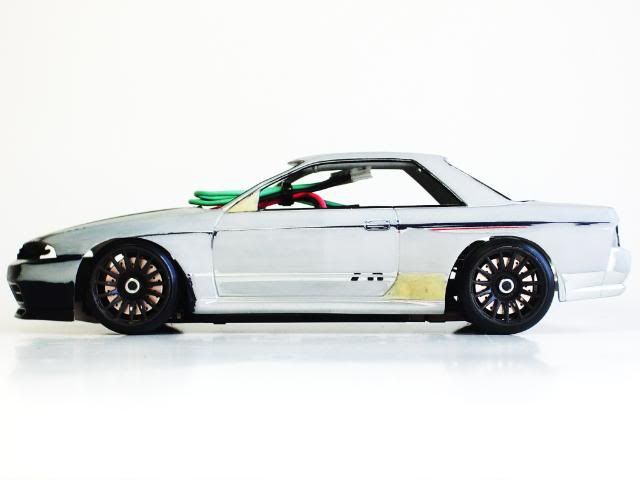
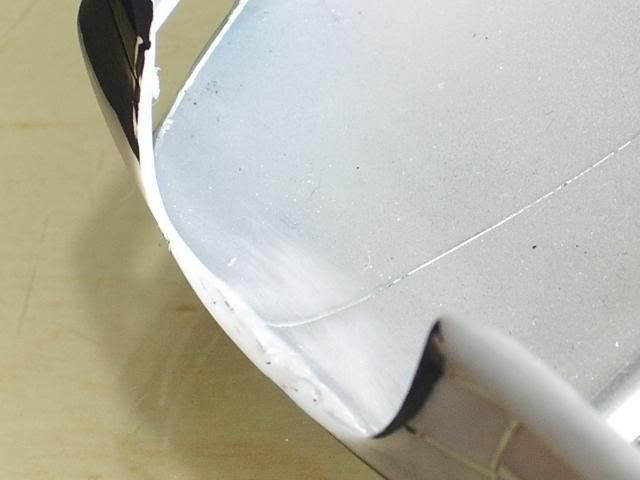
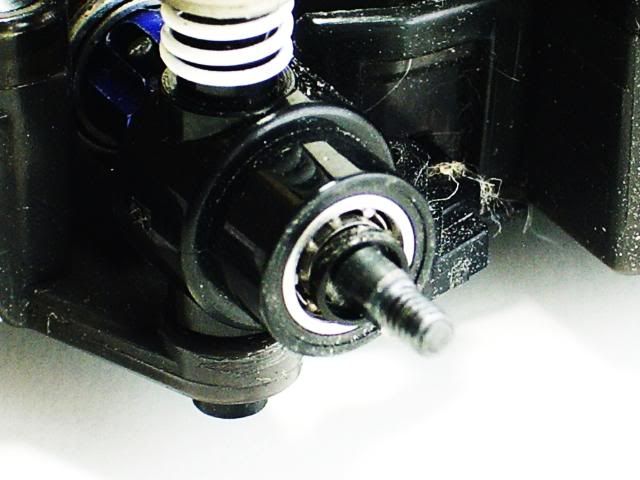
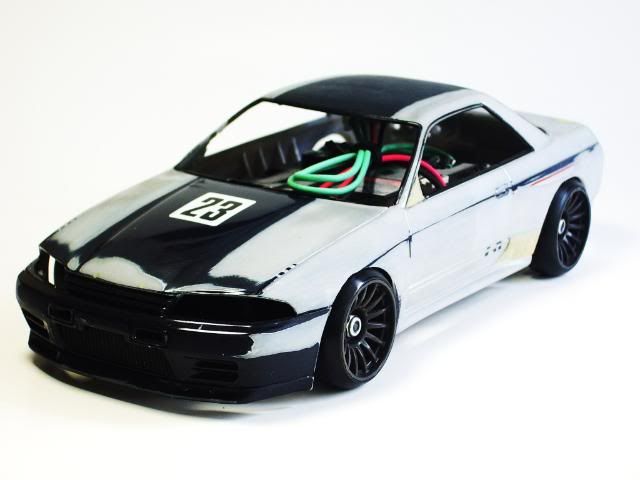
Update: Lowered the suspension, lowered the body, rolled fenders, sanded drift tires to have round edge.

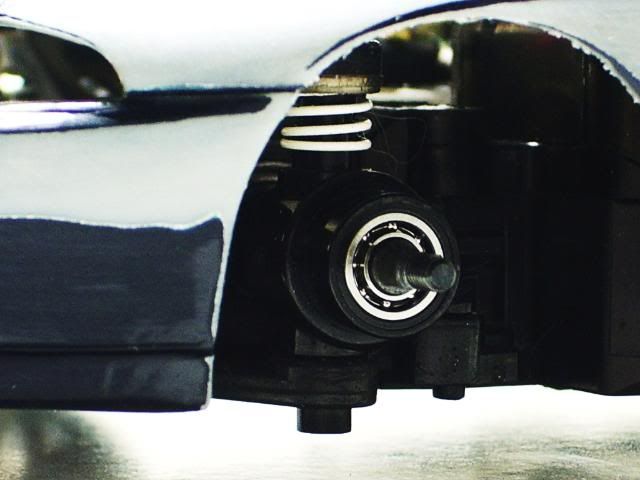
Atomic lower down spring up front.

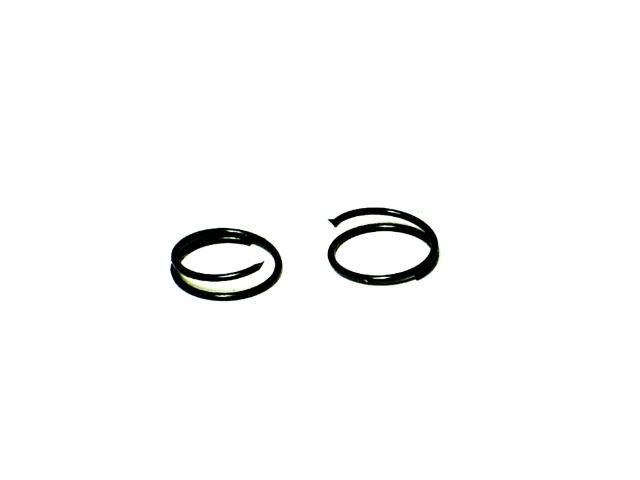
Cut down stock springs for the rear suspension.


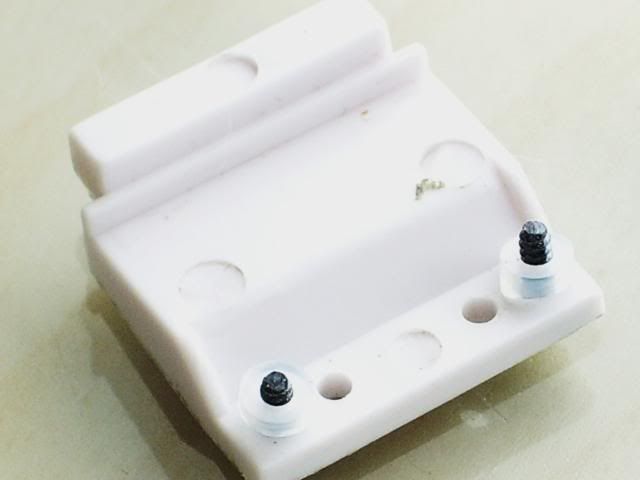
Added 2mm spacer under the front clip.

Moved up the rear side clips by 2mm. Before:
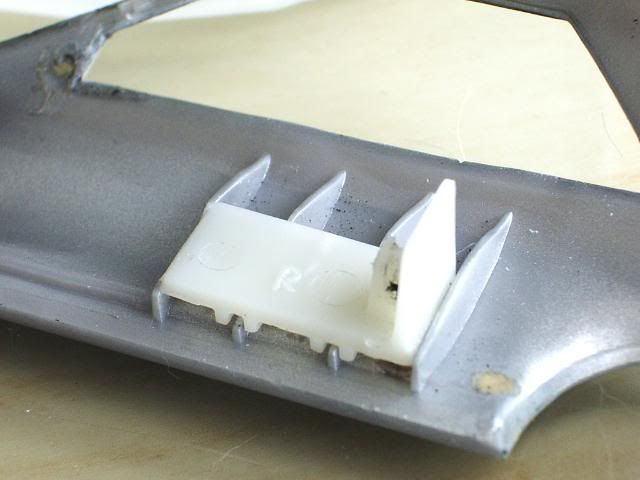

After:
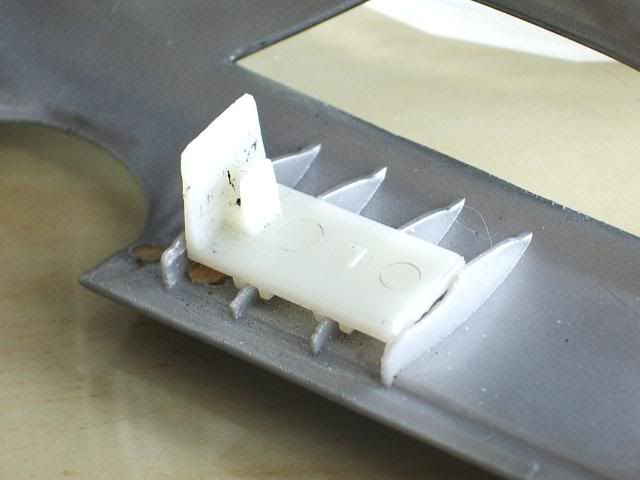

Rolled fenders.


Added 1mm spacer behind all four rims.

Sand down drift tires.
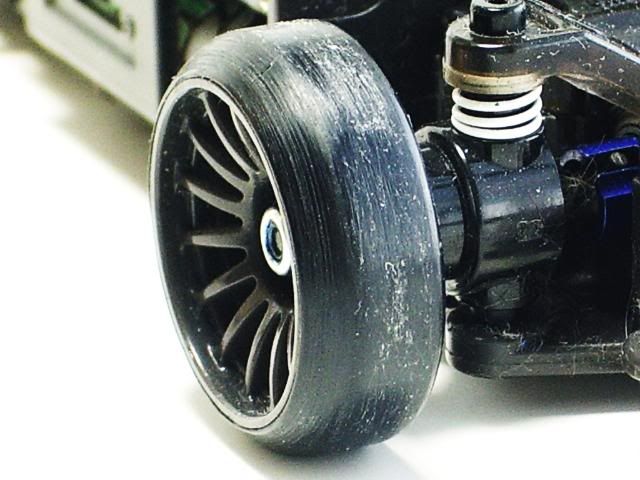


Offset are F:3.5N/R:1.5W with 1mm spacer behind each rims.
__________________

Last edited by Dr. Kustom; 07-27-2010 at 01:43 AM..
Reply With Quote
  #13  
Old 07-27-2010, 03:59 PM
WhiteCharisma's Avatar
WhiteCharisma WhiteCharisma is offline
Drift maniac
 
Join Date: Jan 2009
Location: Rochester, MN
Posts: 151
Trader Rating: (7)
Default

Too nice! such and aggressive stance....... Nice work! your putty work is just so clean....
__________________
Patience and careful work brings great results in Xmodding and life.

Team X.I.
Reply With Quote
  #14  
Old 07-27-2010, 07:25 PM
Dr. Kustom Dr. Kustom is offline
aka xmod4life
 
Join Date: Aug 2007
Location: New York
Posts: 1,083
Trader Rating: (9)
Send a message via AIM to Dr. Kustom Send a message via MSN to Dr. Kustom
Default

Quote:
Originally Posted by WhiteCharisma View Post
Too nice! such and aggressive stance....... Nice work! your putty work is just so clean....
Thanks WC!

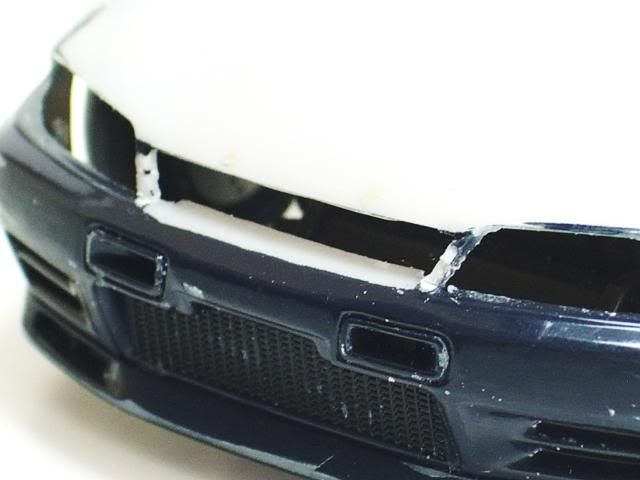
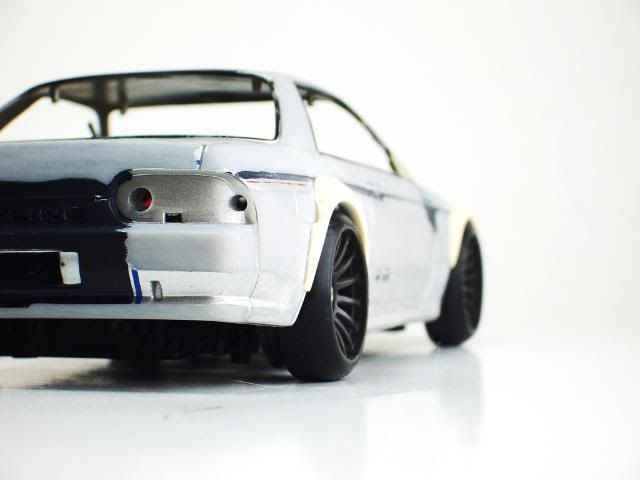
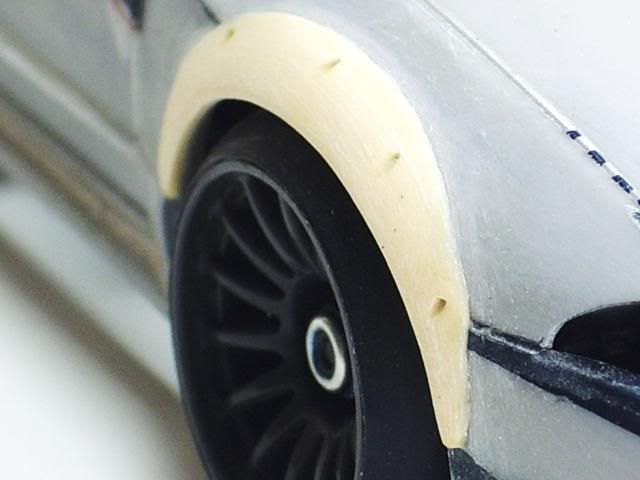
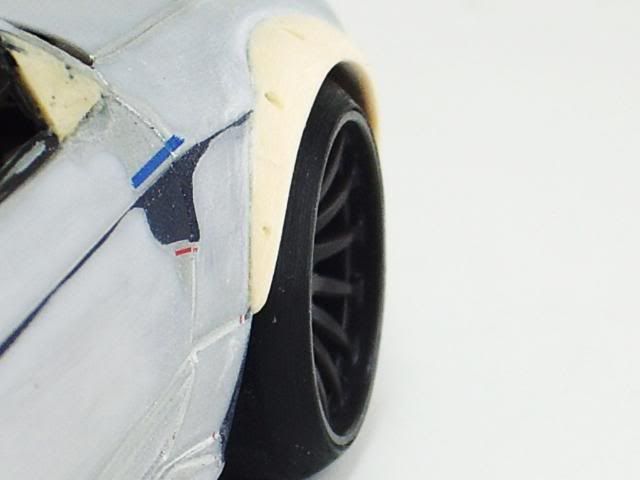
Update: Got the fender flares almost done on 1 side. Also cut out the front grill.
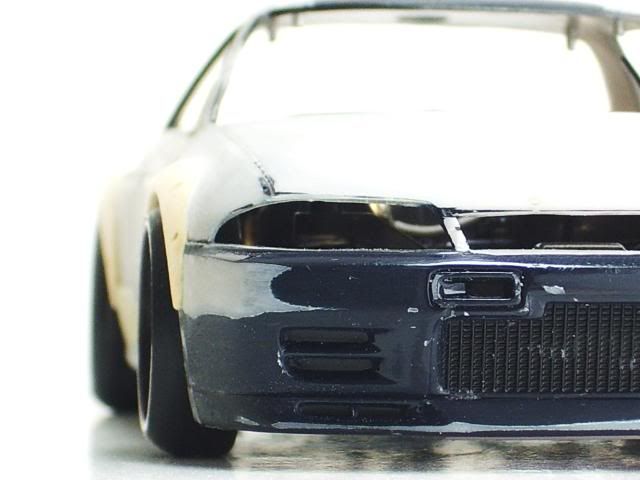


Comments are welcome!
__________________
Reply With Quote
  #15  
Old 07-27-2010, 10:03 PM
Kot Kot is offline
Hakosuka Love
 
Join Date: May 2009
Posts: 244
Trader Rating: (5)
Default

dang..you should be making my fenders LOL. jk. awesome work bro!
__________________
Reply With Quote
  #16  
Old 07-27-2010, 10:19 PM
FloydfanYodaman's Avatar
FloydfanYodaman FloydfanYodaman is offline
dirtlover/moderator
 
Join Date: Jul 2008
Location: Oregon
Posts: 814
Trader Rating: (14)
Default

very nice work...love the stance too
__________________


Team X.I.
Reply With Quote
  #17  
Old 07-27-2010, 11:17 PM
lol lol is offline
Banned
 
Join Date: Jun 2007
Posts: 1,001
Trader Rating: (14)
Default

1 word

HELLAFLUSH
Reply With Quote
  #18  
Old 07-28-2010, 12:57 PM
mini-z drift's Avatar
mini-z drift mini-z drift is offline
Elite member
 
Join Date: Feb 2007
Location: Chicagooo
Posts: 740
Trader Rating: (6)
Default

i love all of your projects!
try lowering it even more!!
__________________
Flickr


Reply With Quote
  #19  
Old 07-28-2010, 03:24 PM
Dr. Kustom Dr. Kustom is offline
aka xmod4life
 
Join Date: Aug 2007
Location: New York
Posts: 1,083
Trader Rating: (9)
Send a message via AIM to Dr. Kustom Send a message via MSN to Dr. Kustom
Default

Thanks for all the comments guys!

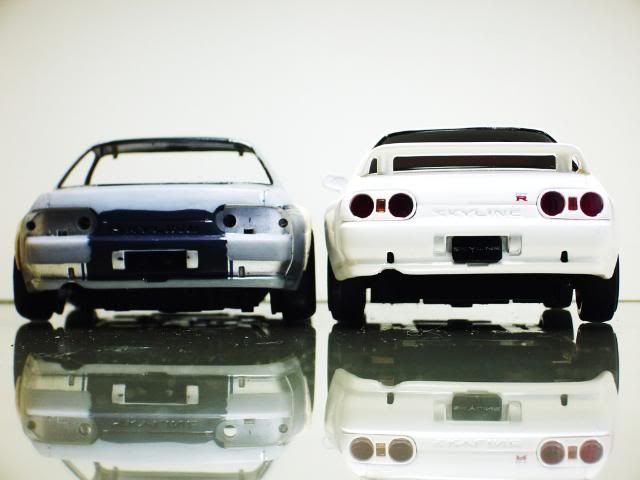
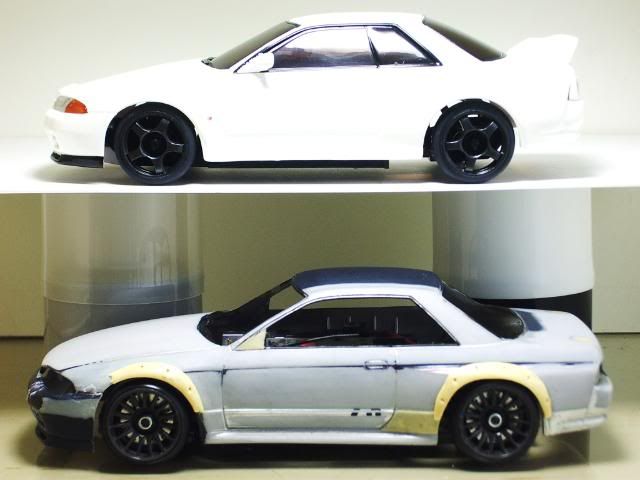
@ mini-z drift - Thanks, I lowered the body as low as possible already, can't get it any lower, here's some pics of my lowered R32 compare to my stock R32.
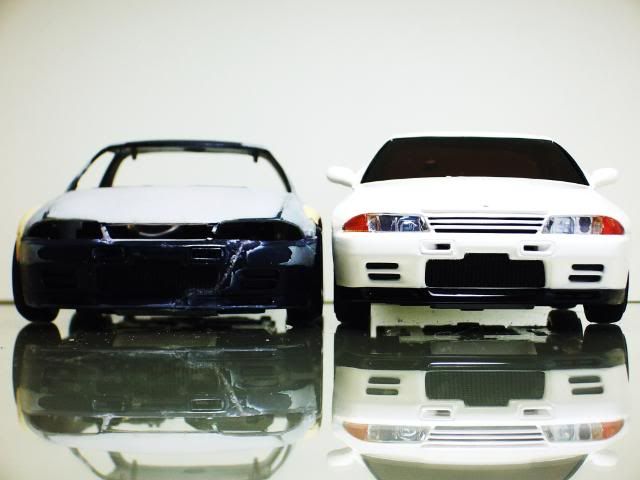


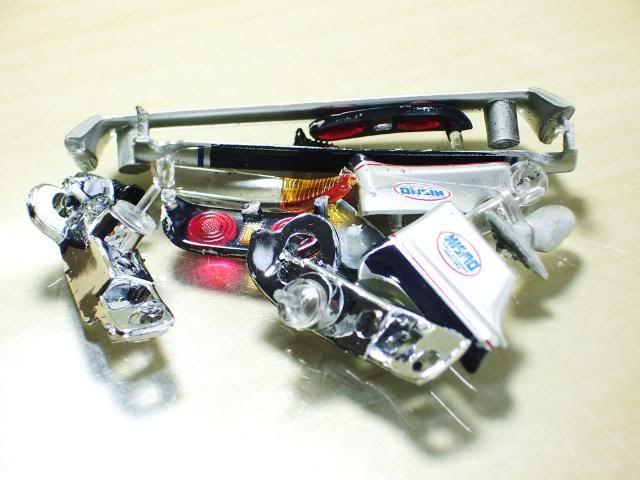
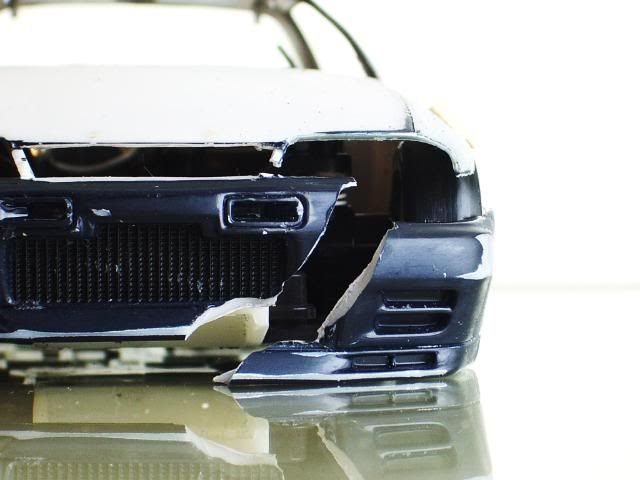
Update: Deiced to drift it on the track, not a smart idea. Got hit on the track and ended up with a broken front bumper.
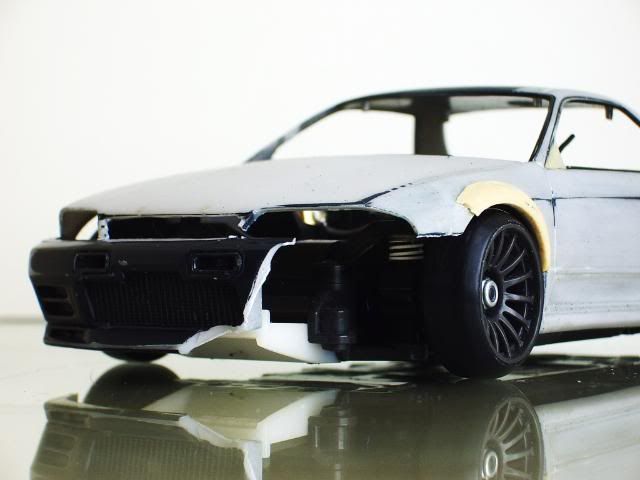

Comments are welcome!
__________________
Reply With Quote
  #20  
Old 07-28-2010, 03:44 PM
mini-z drift's Avatar
mini-z drift mini-z drift is offline
Elite member
 
Join Date: Feb 2007
Location: Chicagooo
Posts: 740
Trader Rating: (6)
Default

authentic drift damage!
dumb idea, but remove the springs, possibly put spacers under the spindles (this will raise them).

does kyosho make a 240sx?
__________________
Flickr


Reply With Quote
Reply


Currently Active Users Viewing This Thread: 1 (0 members and 1 guests)
 

Posting Rules
You may not post new threads
You may not post replies
You may not post attachments
You may not edit your posts

BB code is On
Smilies are On
[IMG] code is On
HTML code is Off

Forum Jump


All times are GMT -4. The time now is 03:44 AM.


Powered by vBulletin® Version 3.8.7
Copyright ©2000 - 2024, vBulletin Solutions, Inc.