
|
|
#1
|
||||
|
||||
|
This tut is a work in progress.. Kinda don't feel like doing much, but I'm gonna work on this for now.. I will remove this and notify a mod when it is done!
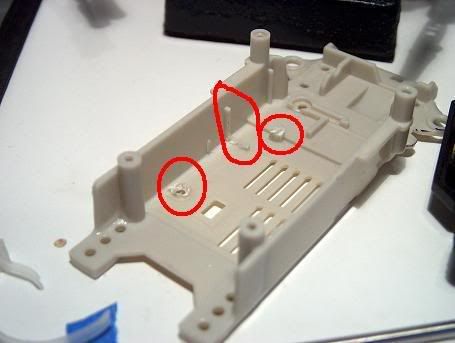
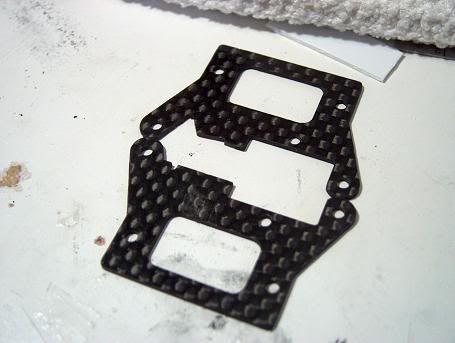
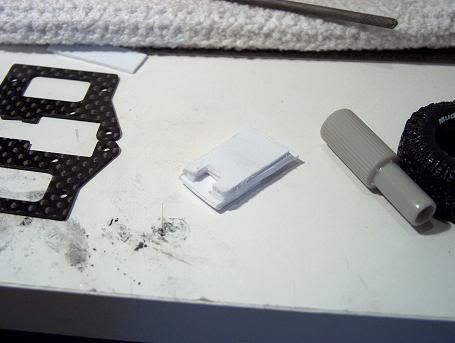
In this tutorial, I'm not doing the soldering, I'm having it done by -XCRL- as I suck at it. But it should be very straight forward, only four or six to solder at. These four points are for the motor wires and for the battery wires. The fifth and sixth points are if you were to jump the power switch, which I also recomend. Materials: -- Micro-T Electronics Package -- Micro-T Stock Servo* -- Gen1 Chassis -- Sheet Styrene -- Servo Tape -- Choice of Glue: CA or ZAP! -- Wire** *You can use another 5-wire servo, but they can be hard to find. You can also convert a 3wire servo to work with the Micro-T EP. Look on R7R for the tutorial. **While you're at it, why not upgrade to thicker wire. I recomend AtomicMods' SuperFlex. Prepping the Chassis: The Chassis needs to be cut in a few places. To do this, drill out the area, then carefully cut away the rest. The areas that need to be cut and filled are circled in RED below. You also need to file the front upper plate. With the stock, it will need to be filed out to make room for the Electronics Board. With the carbon fibre decks that come with the clear chassis updrade, you can just flip the deck. Make sure to remove the servo stay on the carbon fibre deck.   *CAUTION: The clear chassis cracks easily, so be careful when cutting! Mounting the Servo: The stock Micro-T Servo is smaller than the stock Gen1 servo, so it needs to be spaced up and to the side. How you do this is personal opinion. In the pictures it is mocked up using sheet styrene and will be taped in place eventually. The pictures are here for refrence. The Micro-T servo has the wires coming out the bottom rear. This makes it so it can't be mounted just normally, so when working the styrene, cut a small slot into it, and route the wires out behind it, and over the driveshaft. Below is a picture of what I used to raise the servo up. The bottom plate will be removed and replaced with servo tape once mounted.  Other Info: Sweed's Gen1 Build-Up: http://www.xmodsource.com/forum/showthread.php?t=9098
__________________
After a thousand years of oppression,
Let the berserks rise again, Let the world hear these words once more: "Save us, oh lord, from the wrath of the Norsemen" Last edited by Sweed; 08-11-2007 at 03:14 PM.. |
| Currently Active Users Viewing This Thread: 1 (0 members and 1 guests) | |
|
|