
|
|
|
#1
 12-30-2008, 11:47 PM
|
||||
|
||||
|
Okay Tutorial no. 2 is here already. (Man I have nothing to do)
*** Special Thanks to nazcom_101 from the XMODWORLD forums. This tutorial can go 2 ways: 1. To make a custom chassis to fit the length of your 1/24 or 1/25 scale model bodies or 2. To make your own Atomic Stilletto chassis without spending lots of $$$. However you will need to purchase the hardware kit for the stilletto chassis ($15.00) or find an alternative (If you buy that little pack of screws and the 2/56" nuts from RadioShack you can use that..... it works i've done it and still looks clean). Also you may purchase a 6"x12" sheet of 3/32" CF from dragonplate.com (this is expensive but you will be able to make about 6-10 chassis's with this sheet) WHAT YOU NEED: Stilletto hardware (used in this TuT, or the RS screws and nuts 2/56)  Carbon fibor sheet, BLACK dvd case or anything similiar that is very strong but has some flex. 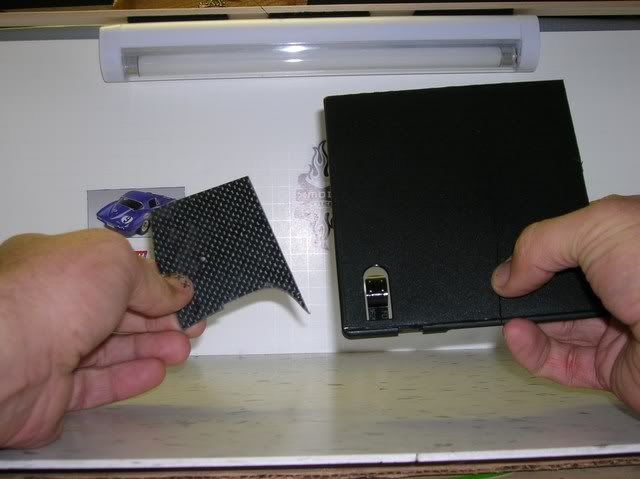 Go to this link http://xmodworld.com/modules.php?nam...er=asc&start=0 and right click on the EVO chassis diagram and "save as" once it is saved open it in MS Paint. You will have to resize it and ... well ... print it out again and again until it is the correct dimensions. (don't use the photo I have here) 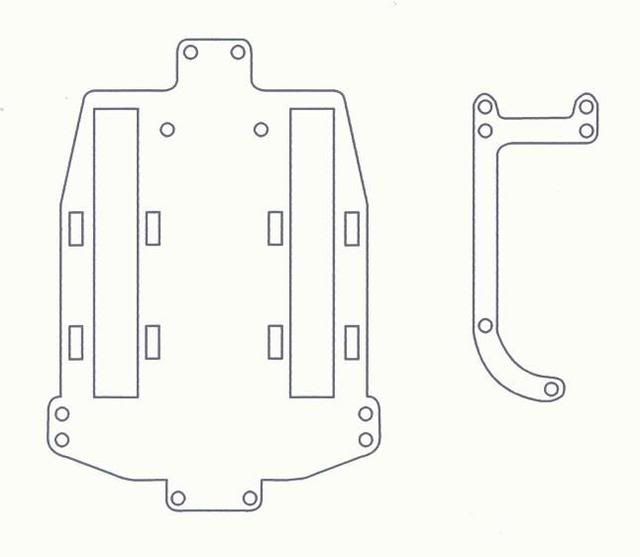 All these tools 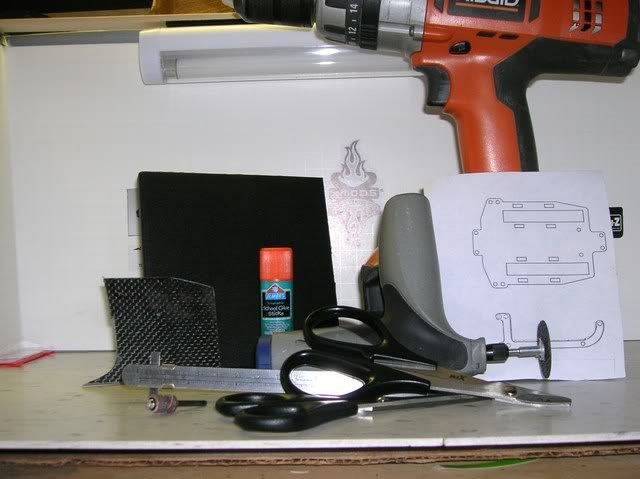 And of course your EVO chassis and the model body your fitting. (if your just gonna make a Stilletto for your Xmod you don't need the model body drrr)  STEP 1 - Print out your template (I know may take awhile) 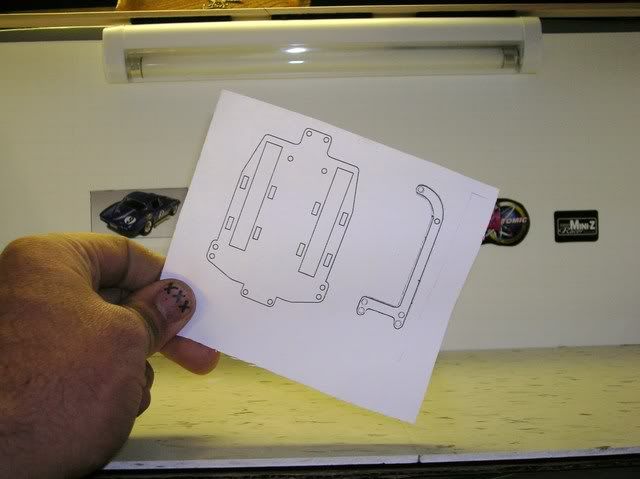 STEP 2 - Measure the distance from the center of the front wheel to the center of the rear wheel. Rememer the stilletto only has the first 2 settings. 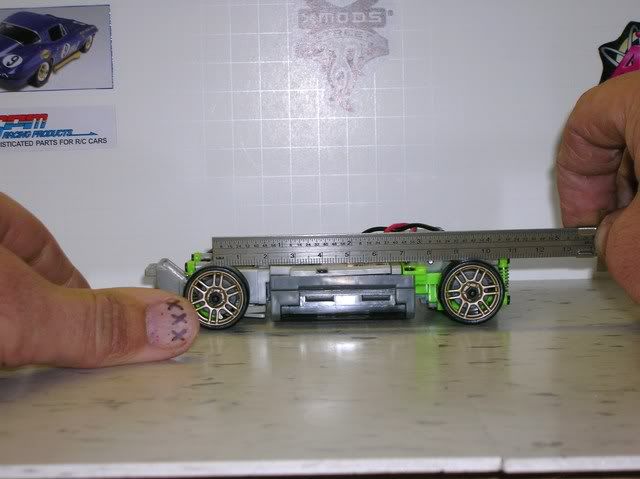 STEP 3 - Measure the same thing for your NEW hot Revell body. 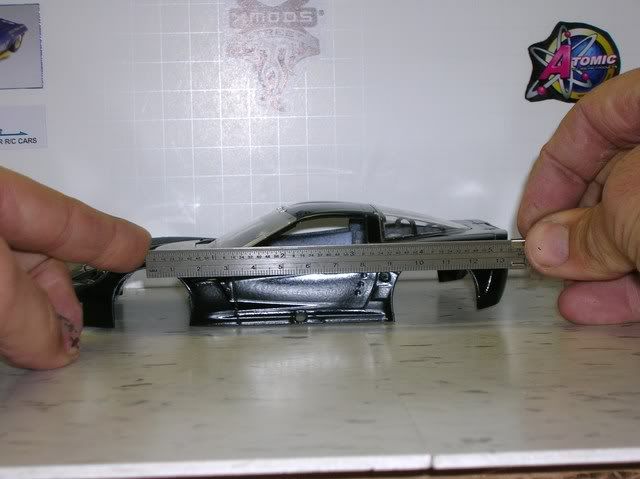 STEP 4 - Now subtract the shorter length from the longer length. In this case we get 1.2cm. 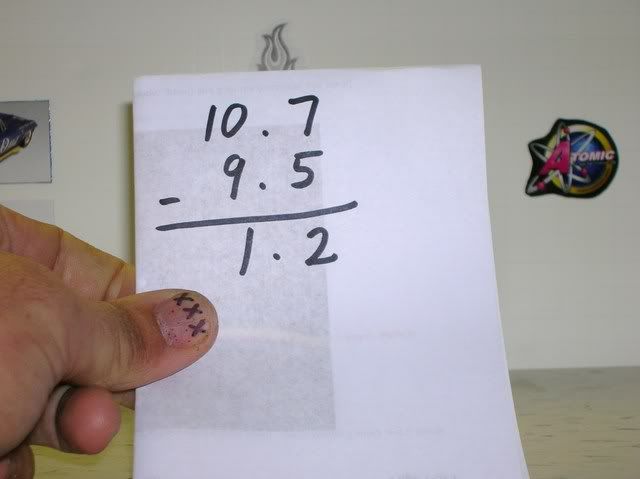 STEP 5 - Now take your template and mark on both sides 3.5cm from the front of the chassis to the center like this. 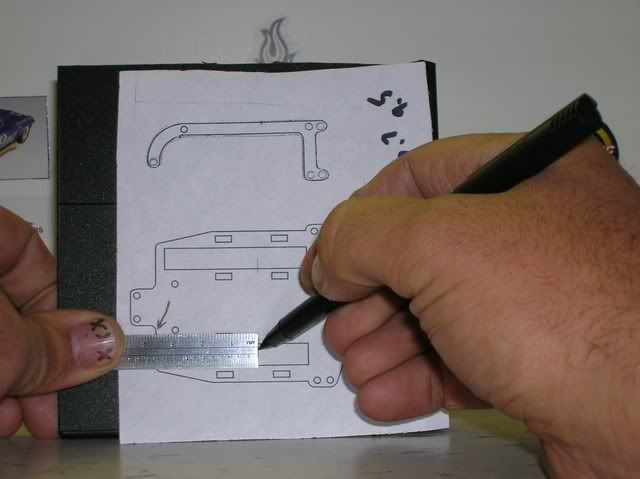 STEP 6 - Then using your ruler connect those marks with a straight line making sure to go through both parts of the chassis. 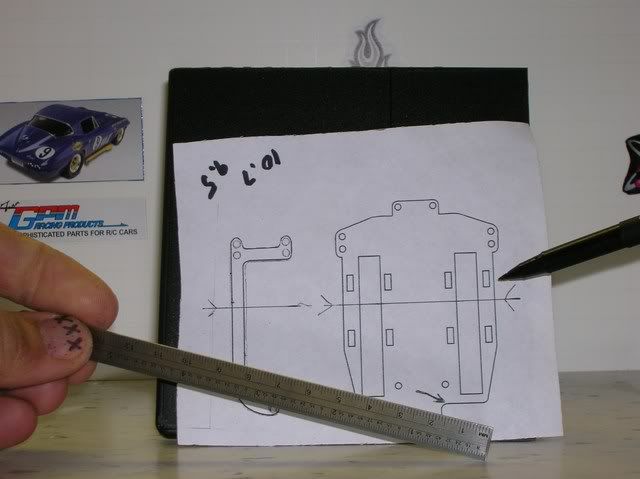 STEP 7 - Now with a nice pair of scissors cut out your templates. Be sure to cut it clean and through the black outline. 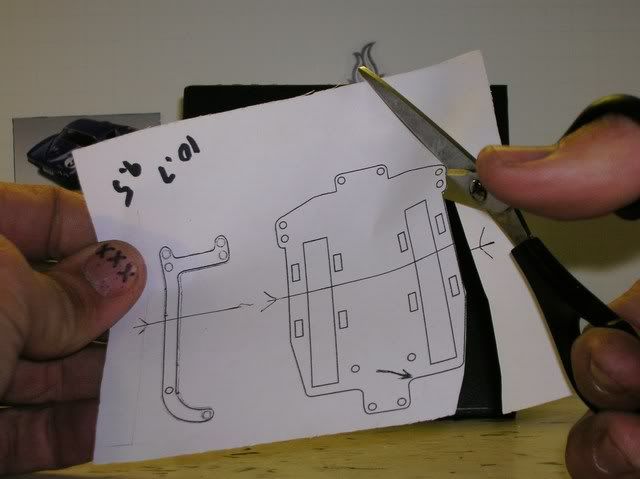 Cut the pieces in half across the line you drew. (Don't do this if your just making a standard Stilletto) 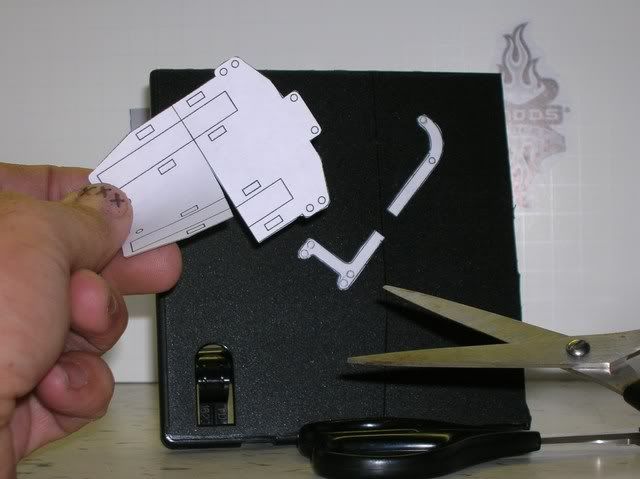 STEP 8 - Get out your CLEAR glue stick and LOAD it up on the back side and stick it to your material. 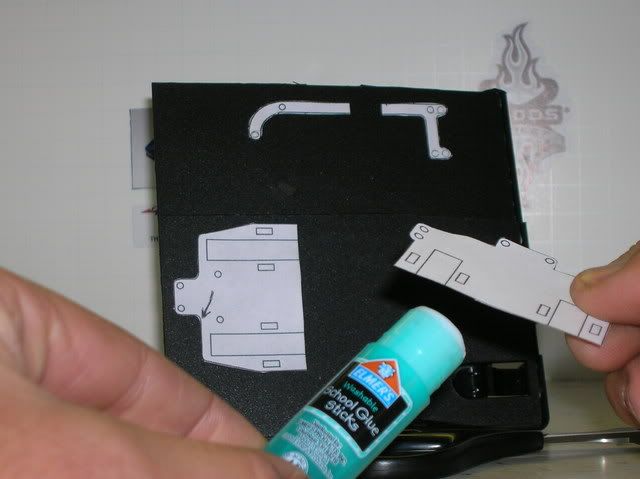 Be sure now to seperate the pieces by the amout you came up with from step 4 (1.2cm for the tutorial) 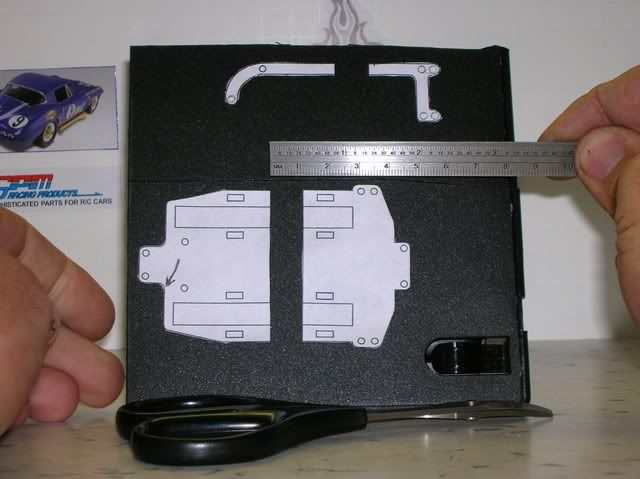 STEP 9 - NO PHOTO for step 9. Now you cut it out. I use a scroll saw, but you can also use a jigsaw with a small saw blade. Most of you will probably just cut it out by hand. In this case I suggest an exacto knife and about 2 extra blades. Trace it out very well and slice through. (Make sure to leave the template glued to the parts after and during cutting) You may also use scissors BUT BE VERY CAREFULL. The scissors can crack the dvd cover if you go to fast. You decide by what material you are using and what you got around the house, either way STEP 9 is to cut it out. (clean up the edges with the sanding cylinder attachment on your dremel. 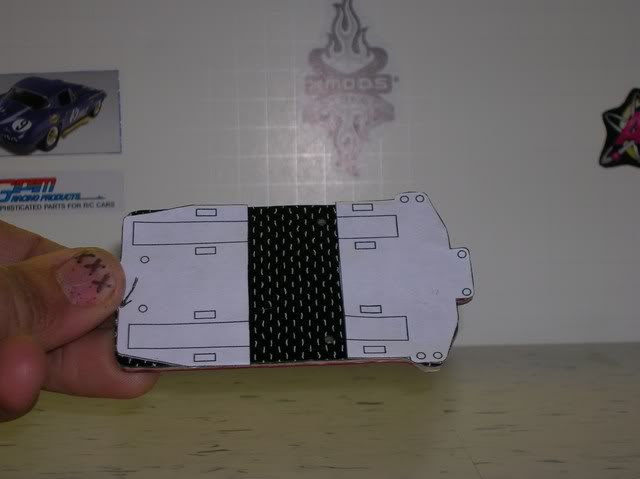 STEP 10 - Get out that drill. You should still have the template glued to the parts so VERY carefully drill out where the holes are. 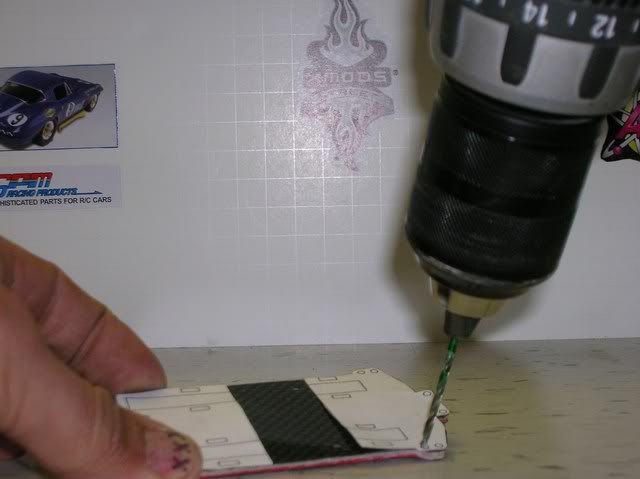 STEP 11 - Dremel out a little bit on the neck so that the swing arm can move smoothly. (This is for if your using CF and the RadioShack screws and nuts). If you purchased the Stilletto hardware then you can skip this. 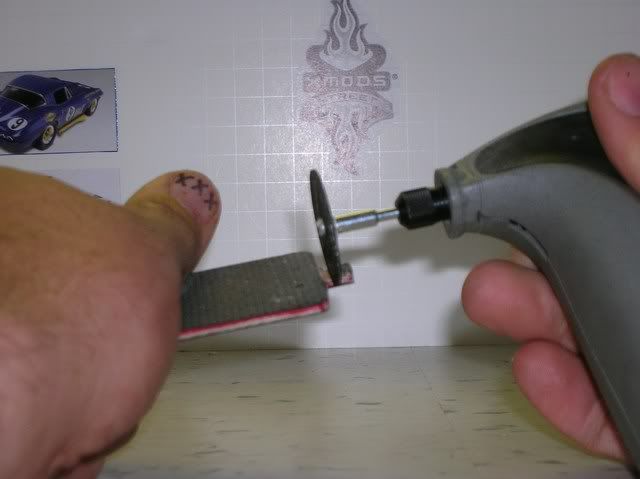 Should look like this. 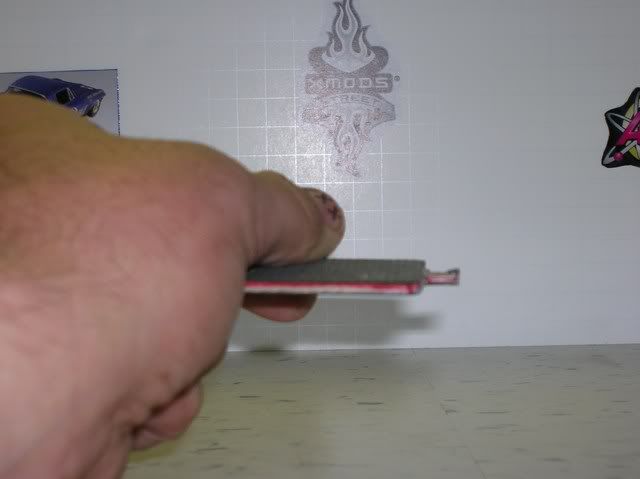 Then like this. (At this time use some super glue or model epoxy of some sort and seal the edges if your using CF. Also you can take a black marker over that once it drys to blacken the edge. 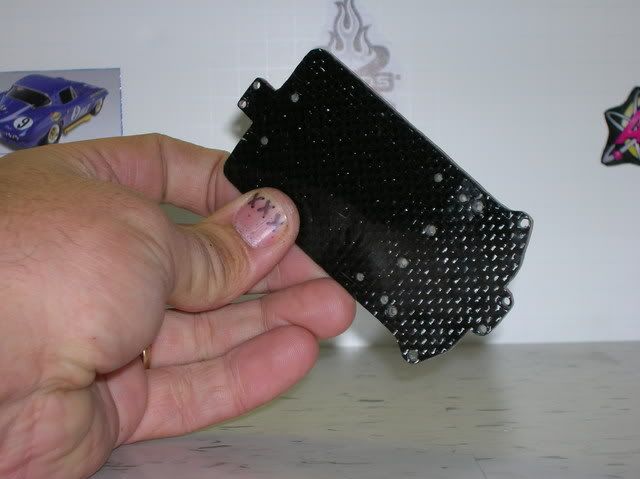 STEP 12 - Now all we do is install it to are chassis using the Atomicmods Tutorial at this link http://www.atomicmods.com/Categories...tallation.aspx and now you have a beautiful chassis for that 1/25 model body and it looks like it came that way in the box. (If you want when using Li-ion you can cutout the batterry slits but you don't need to. Any battery will fit fine without it like mine here. 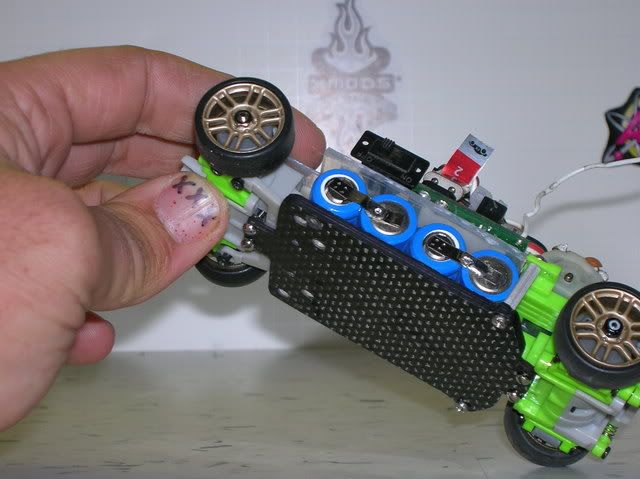 ENJOY. PM me with suggestions for wanted and needed Tutorials. Thanks.
__________________
 XXX FREE modding Service: http://www.xmodsource.com/forum/showthread.php?t=17800 PM me for a quote or any questions. HAPPY MODDING 100% Positive Itrader feedback http://www.xmodsource.com/forum/itrader.php?u=6901 Last edited by TripleXmodder(akaXXX); 12-31-2008 at 12:24 AM.. |
|
#3
12-31-2008, 01:04 PM
|
||||
|
||||
|
Looks like the hobby grade electronics or a Mini-Z/iWaver board there, it could possibly be able to handle 4s?
__________________
Woah.
 |
|
#6
12-31-2008, 02:57 PM
|
||||
|
||||
|
Quote:
http://www.xmodsource.com/forum/showthread.php?t=15324
__________________
XXX FREE modding Service: http://www.xmodsource.com/forum/showthread.php?t=17800 PM me for a quote or any questions. HAPPY MODDING 100% Positive Itrader feedback http://www.xmodsource.com/forum/itrader.php?u=6901 |
|
#8
12-31-2008, 03:51 PM
|
||||
|
||||
|
Quote:
__________________
XXX FREE modding Service: http://www.xmodsource.com/forum/showthread.php?t=17800 PM me for a quote or any questions. HAPPY MODDING 100% Positive Itrader feedback http://www.xmodsource.com/forum/itrader.php?u=6901 |
|
#9
12-31-2008, 03:55 PM
|
||||
|
||||
|
Doesn't CF dust kills your lungs? You should write in the precaution and what to wear to be doing this tutorial as it is more of an intermediate style of tut.
Otherwise, your the man! that cf chassis is so clean...Can't wait to see more!
__________________
 |
|
#10
12-31-2008, 04:00 PM
|
||||
|
||||
|
Quote:
__________________
XXX FREE modding Service: http://www.xmodsource.com/forum/showthread.php?t=17800 PM me for a quote or any questions. HAPPY MODDING 100% Positive Itrader feedback http://www.xmodsource.com/forum/itrader.php?u=6901 |
|
#11
12-31-2008, 04:18 PM
|
||||
|
||||
|
very nice tutorial, definately a plus from haveing to add and secure extra spacers. and you get a clean looking chassis too.
__________________
Keep smiling, people will wonder what your up to.  TEAM X.I. my massive collection of xmods http://www.xmodsource.com/forum/showthread.php?t=13526 |
| Currently Active Users Viewing This Thread: 1 (0 members and 1 guests) | |
|
|


 Linear Mode

