
|
|
|
#1
 03-28-2008, 02:36 AM
|
|||
|
|||
|
so xmod4life finally motivated me to get off my butt. ive been wanting to do this for a while, but couldnt figure out what i could build it out of. then tonight i walked into my play room and realised i hadnt thrown out the box my chinchilla cage came in, and the ideas just sparked! so i started the project... heres the pics
The Box...  The Possible Shop Layout.  Cutting the Box Down  Building it back up.  Classic Checker board Floor.  Floor not glued down all the way....  Walls Up.  Front Wall   of course its not finished yet. thats just as far as i got tonight. ill work on it tomorrow some more... and take some new pics... still to come... Finish out side parking lot finish out side walls finish the floor (glue it down) hopefully fix the bad seam in the middle of it i did a horrible job in lining the pieces up in the middle lol. need to build a dyno a lift or two. add banners to the walls like these...     kinda going to base this shop off of ralliteks shop (place i use to work) 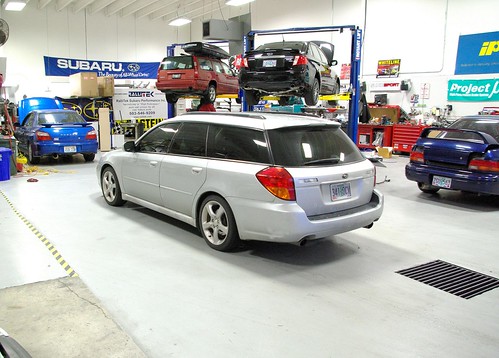 cept the only checkers we had was in teh show room lol. 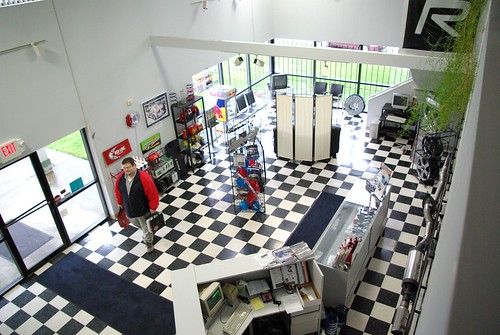 anyway heres some random pics of the cars just for fun during the build process.         anyway updates tomorrow when i get more done. |
|
#2
03-28-2008, 02:48 AM
|
||||
|
||||
|
lol looks good for a cardboard box sweet looking forward to the update lol
__________________
CANADA 14 GOLD MEDALS BABY! silly americans hockey is for canadians! |
|
#3
03-28-2008, 03:03 AM
|
|||
|
|||
|
well hopefully after its done it wont look like a cardboard box lol
|
|
#4
03-28-2008, 03:14 AM
|
||||
|
||||
|
i tried to do thhis once when i was young with those hot wheels cars, t'was my dads idea, but i ended up with hot glue in my hair and multiple burns on fingers, i was gonna try again, but don't know where to put it,
o, and maybe u cud add some vents to walls for some realism, and hang some body kits, just an idea |
|
#5
03-28-2008, 05:33 AM
|
|||
|
|||
|
Quote:
|
|
#6
03-28-2008, 08:11 AM
|
|||
|
|||
|
I must say this is pretty cool depending how far you go with it, i mean you could make the "managers office", receptionist area, waiting room for "customers" and a few lifts for the cars. Then if you get really detailed even a functioning garage door on the front lol. That'd be amazing and maybe you could set a motor to open and close once a button on the controller is pressed. It looks good SPR, can't wait to see updates and the finished product.
__________________
 |
|
#7
03-28-2008, 09:54 AM
|
|||
|
|||
|
well i will be making lifts, both 4 post and 2 post. i will be making a somewhat functional garage door. it wont be motorized (atleast not any time soon) but it will be there. i havnt really put to much thought about into the show room part, i guess that would be cool touch to display some body kits and stuff maybe? i might add on later. we will see. let me finish the shop first, im going to work on it right now
|
|
#8
03-28-2008, 02:25 PM
|
||||
|
||||
|
cool idea
its going to look nice when you get the banners in there |
|
#9
03-28-2008, 03:12 PM
|
||||
|
||||
|
No alls you need is 1 or 2 lifts,and some smal scale tools..
__________________
My youtube channel! |
|
#11
03-28-2008, 03:27 PM
|
|||
|
|||
|
WoW! Looks like a great start right there, can't wait to see more update.
|
|
#13
03-28-2008, 06:24 PM
|
||||
|
||||
|
Looking good so far and keeps it up great work. I likes your checker floor, lol.
4x4Daddy
__________________
Like Nothing Else. ~ Hummer H1 Wagon SSMT/XMODS ~ 20% Accomplishment H2 Crawler ~ 75% Accomplishment |
|
#14
03-28-2008, 06:30 PM
|
||||
|
||||
|
Quote:
Quote:
Quote:
Glue Stick (like u used in 1st grade, no elmers or any other luquid glue will NOT work. it will bleed threw the paper and ruin it.) Printer Paper (unless you want blue pin stripe wall paper) Card Board Box Hobby knife (my box knifes are out of blades) sissors sharpie tape, i used packing tape and electricle tape. and a yard stick for making straight lines. i drew the straight lines with the straight edge on the yard stick, used the hobby knife to carfully cut it out (which kinda turned out crappy) used packing tape to hold the box back together. then got on my computer... wiped up a checker board floor in photoshop, printed the design out on 6 full sheets of paper, and patched them together using a glue stick, then glue sticked them to the floor on the cardboard. then i took plain white paper and glued sticked it to the sides for the walls. and i used eletrical tape to cover the edges of the carboard so it looked a little cleaner, and it also kinda played off the checker floor too, kinda like a black painted trim, which i think the idea looks good. but the tape is sorta tacky looking. but its turning out okay for a quick, fun litttle project. its not going to stay this way forever, ill prob rip off all the paper, and actually paint someday when im a little less lazy. also the "banners" are just dont up in photoshop as well printed out, and then placed on a piece of packing tape, and then stuck to the walls. i woulda glue sticked them up... but i ran out and im to cheap to buy more lol. another reason this will get redone in the future... Quote:
Front wall/start of the door.   of course some will be placed in the parking lot when i finished it, but atleast they all fit in the shop with some spacious room.  now as i mentioned i wanted a dyno... ive always worked with dyno dynamics, and they really are the best. so naturally thats what i would want in my shop... so i did my best to create one, down to the right color.... heres a pic of a dyno dynamics dynometer. (note the awd one of course)  the only thing i forgot was to make the little blue box, which i will be fixing! but man tell me how perfect does this look for being legos    anyway i didnt get very far today... but heres 2 other random pictures.   im not really liking how its turning out, which is one reason im not putting any money into it... so it will be getting redone... but im still gonna finish it for now, just for fun so i can get an idea what i like, and what i dont like and waht i want to change.... Still to come! Rolling up and down garage door. Fans and Computer for the dyno Lifts Parking Lot More Banners for the wall Suggestions on what else? |
|
#15
03-28-2008, 06:33 PM
|
|||
|
|||
|
Quote:
oh yeah!! i got these little lego chains... im going to use to tie down the car to the dyno and see if i can actually drive on it or not if its chained down lol. since the wheels on it do roll. it might work if im lucky haha. |
|
#16
03-28-2008, 06:39 PM
|
||||
|
||||
|
that looks just like my 350z. anyways, nice everythings.
__________________
(oooo)----(oooo)
|
|
#18
03-28-2008, 07:42 PM
|
||||
|
||||
|
I like your checker floor. I also like the ramp you made for the subaru and the Enterie is good too. Good Job on the project
|
|
#19
03-28-2008, 08:01 PM
|
||||
|
||||
|
amazing...
did you make the box smaller? on the previous pictures(before the update) the box looked bigger... |
|
#20
03-28-2008, 08:02 PM
|
|||
|
|||
|
Quote:
HAHAH dont think so. all 3 of my suby bodys are MINT not a single sratch on them, and ill never sell em, keep dreaming and drooling lol. |
 |
| Currently Active Users Viewing This Thread: 1 (0 members and 1 guests) | |
|
|


 Linear Mode

