
|
|
|
#41
 08-11-2009, 10:44 PM
|
|||
|
|||
|
Thanks for the pic XMD
Blade. 
|
|
#42
11-08-2009, 09:27 PM
|
|||
|
|||
|
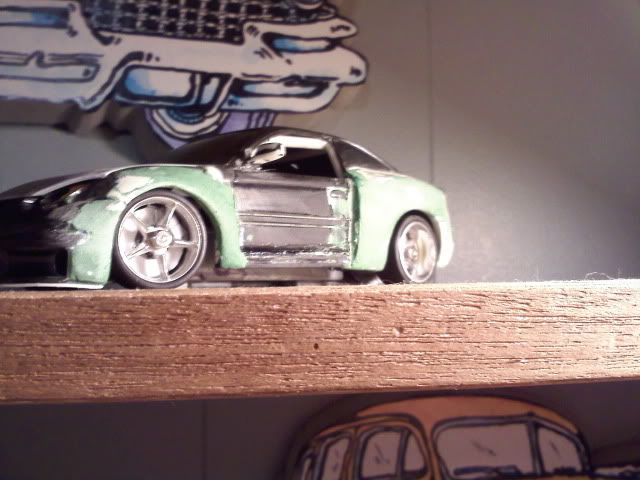
And people thought this had died.
Here's an update. 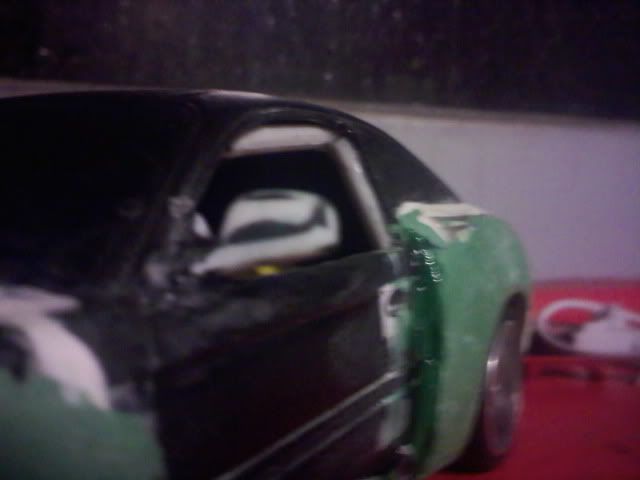 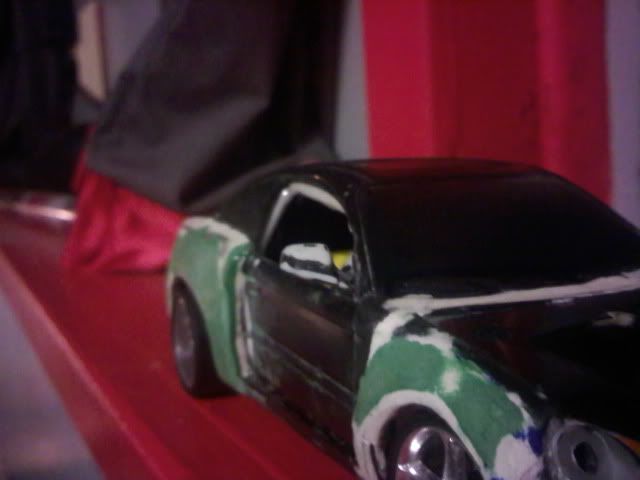 As you can see with these two pictures, I moved the Wide Body back some in the rear. Now, I don't have to put in door lines any more. 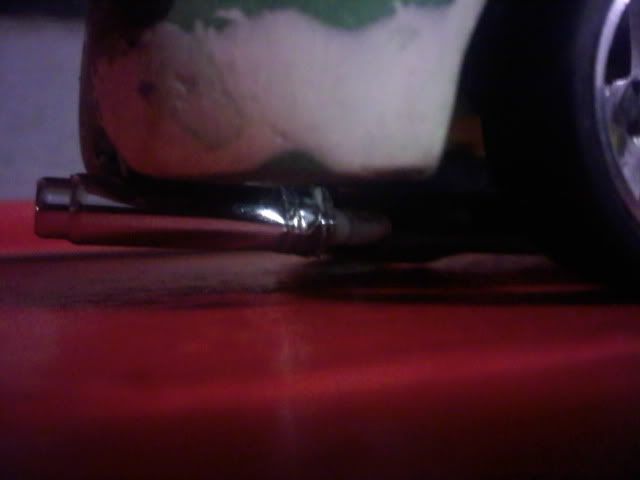 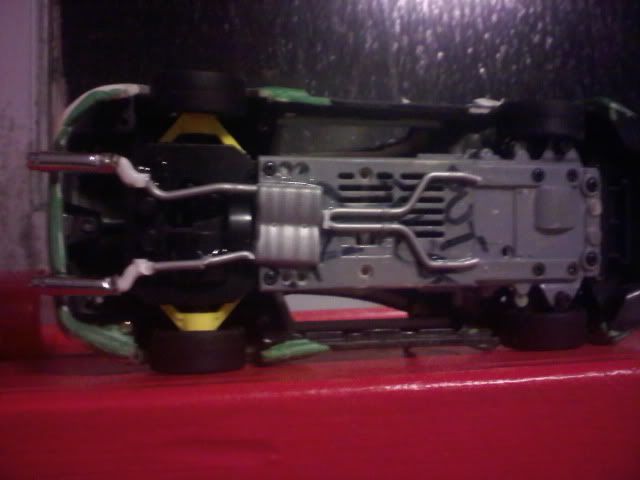 I have NO driving space under her anymore. Well, maybe just .5mm she is extremely low with those pipes and the muffler. Yet, I want to put some headers on her also... I'll see what I can do, next update will hopefully be soon. I'm doing some Disc Brakes for her right now. If I'm lucky, I'll put some brake lines in also, and have an attempt at a pumpkin on her also. Q&C&C Welcome like always. Blade.
|
|
#44
11-08-2009, 10:38 PM
|
|||
|
|||
|
Quote:
Also, ran into a little problem with the disc brakes, guess I'm going to be custom making some. Whoohoo.. Not the first time though. Update soon(picture wise) Blade.
|
|
#45
11-09-2009, 12:29 AM
|
|||
|
|||
|
Unsure if this is considered a double post... It's been 2hours!
and here is the update! Whoo!!!!  What is that behind the rim? What the hell? 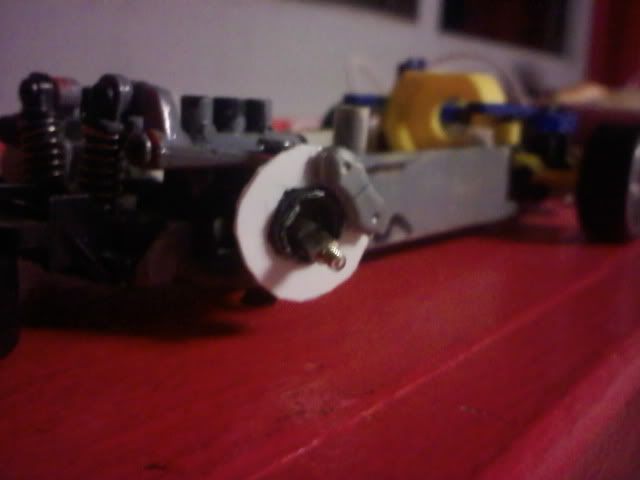 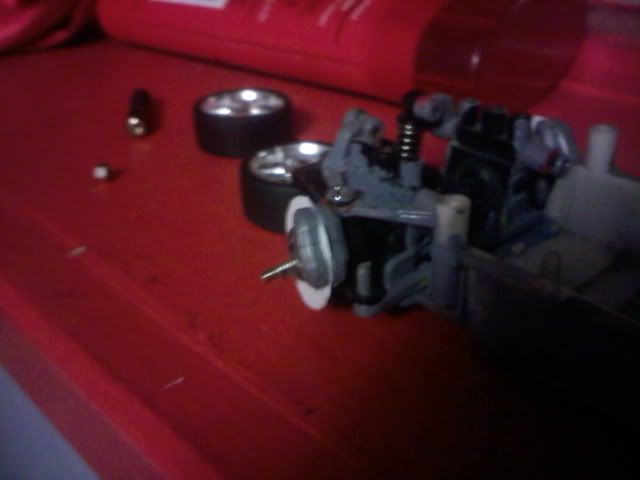 That's what it is! A Rotor and Caliper!(1 Piece of a Caliper on each side of the rotor, on both front sides.) 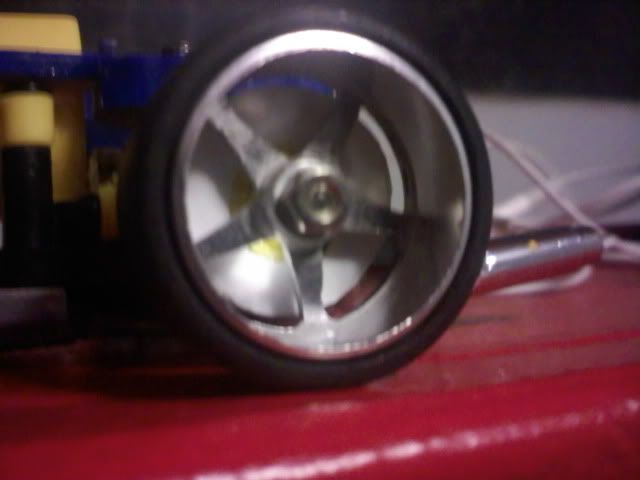 Aww shucks! Well, the rear rotors are not finished because I need to make some calipers that actually FIT on the side that the rim is closest too. The back side is going to be easier. Blade.
|
|
#47
11-09-2009, 01:12 AM
|
|||
|
|||
|
Quote:
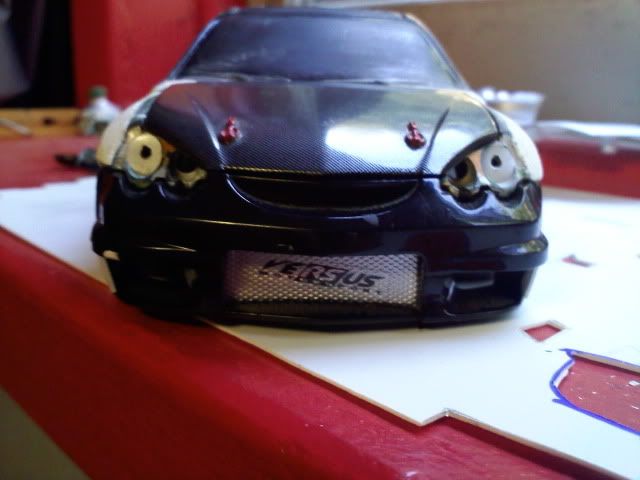
Update, roll cage is finished! Whoo! Splitter is also finished! 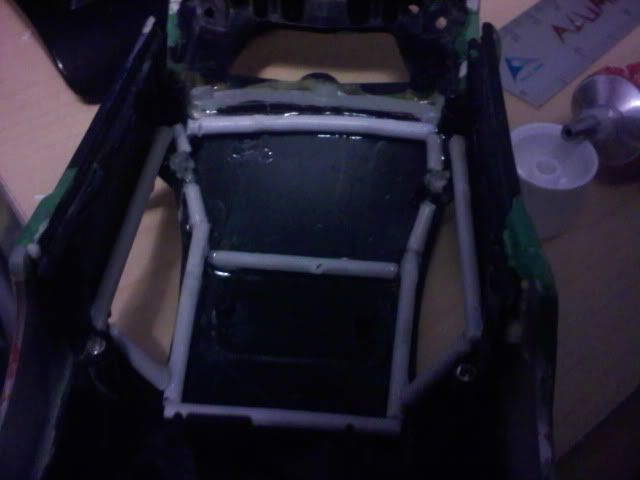 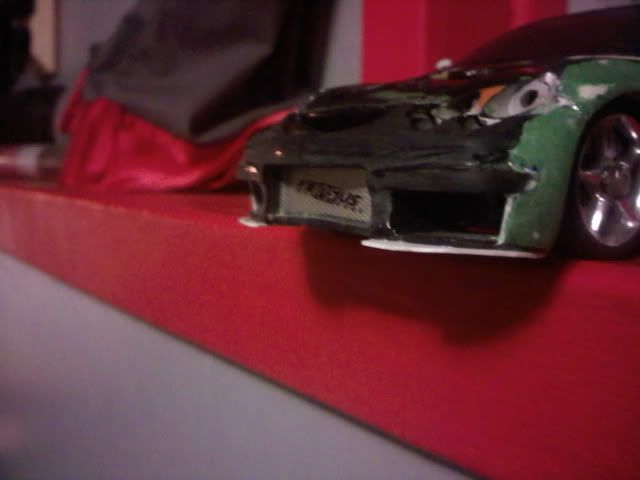 Look!!! Multiple things done in 3-4hours! 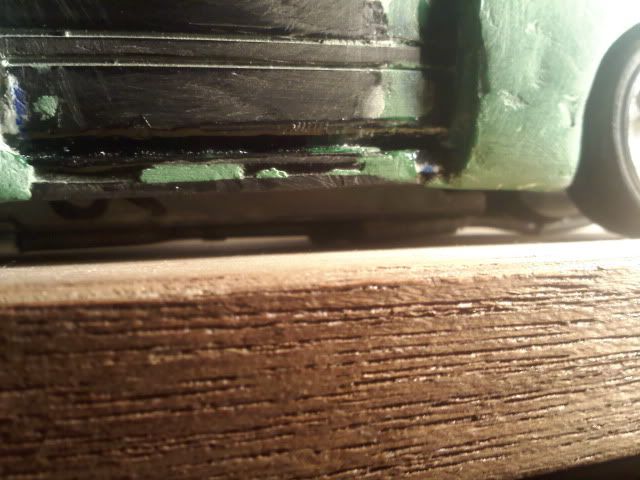 My amazing clearance... Blade.
|
|
#49
11-09-2009, 01:47 AM
|
|||
|
|||
|
Yeah I know, I'll have a go at it with sand paper tomorrow. The car, well... Yeah it's got some scars in her right now, have to do a little patchwork around her. That is all for tomorrow though, the rotors and calipers will look a whole lot better with paint being slapped onto em', until then though, I'm calling it a night.
Blade.
|
|
#52
11-09-2009, 04:40 AM
|
||||
|
||||
|
not bad.
i would suggest trying to find some larger rims to increase clearance. for the disks,use a template or compass and scribe a circle,put a 2mm hole directly in the center,cut it out leaving a bit of meat on the outside of the circle,grab a screwed shank bit for cutoff wheels and screw the disk onto that. crank it up and run it over some sandpaper for a perfect circle. ream the inner diameter to the size you need and call it good.
__________________
Time you enjoy wasting is not wasted time....
|
|
#53
11-09-2009, 12:47 PM
|
||||
|
||||
|
glad to see you came back to this...a little more time and sanding and this will be a cool car...take your time...have fun with it...color ideas?
__________________
 Team X.I.
|
|
#54
11-09-2009, 10:58 PM
|
||||
|
||||
|
You took on a job there. Just shy of building a body from scratch. The only suggestion I can make for anyone doing a wide body job would be:
1 Cut very small pieces of styrene and super glue them to the body panel. It should look like broken tile pieces that conform to the contours of the body section being modified. 2 Apply your putty. You should not need very much. Just enough to fill in the gaps between the pieces of styrene. 3 Sand enough to make the putty flush with the applied styrene pieces. Think of the styrene as a sanding guide. The smaller the styrene pieces the better. This seemed like a good thread to offer anyone a little advise, since some body work is going on. Keep it up.
__________________

|
|
#55
11-10-2009, 09:35 PM
|
|||
|
|||
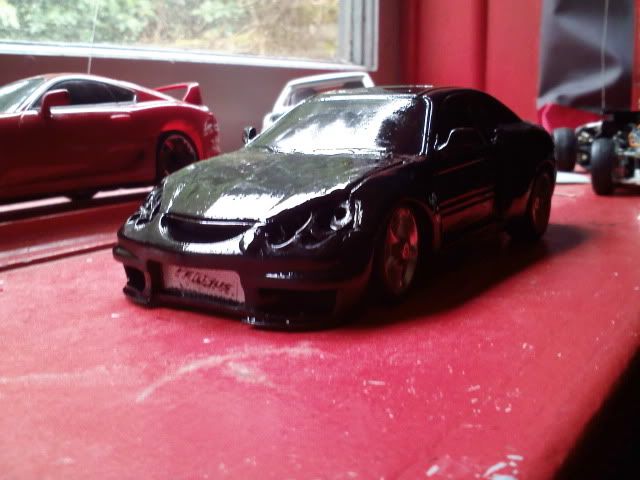
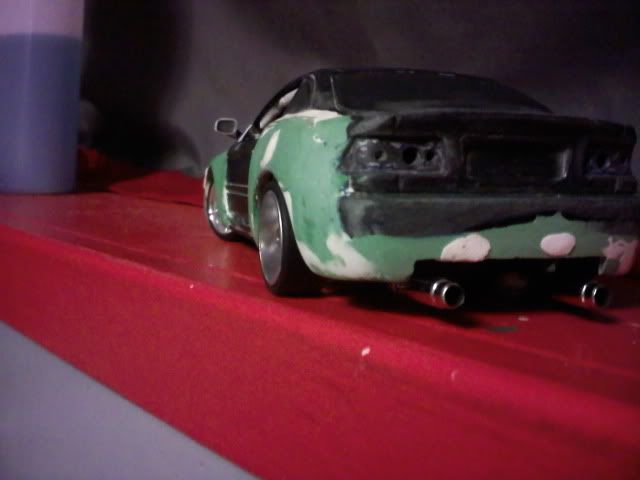 Here's a little candy for you guys. If you can spot it, there is something different here... Oh, and I will be making wide-body rims for this car now, I added the rear calipers(Mitsu Eclipse Calipers from the F&F Model kit.) they are smaller than the ones up-front, but now it looks like it had a rear rotor/caliper conversion from a drum setup. I am very happy with the amount of work I've put into this. Thank-you Shapecharge for the body-kit imput! Very useful, and very happy to find out your secret! Thanks Bondo for the advice on the rotors! I will be using sand paper to finish it up. The left rear is fine, the one that I really need to fix badly in the right front. The left front is a minor fix, same as the right rear. Oh! And if you have a question about the front calipers, they are from a Dodge Magnum model kit. Currently waiting on the putty to dry, they are crack/depression fillers. I hope I can get some grey primer and lay some primer on her... Just one question for the lighting experts, will about 20 LED's be able to run off a 9V battery without a resistor? I am thinking of wiring up 20 LED's to a 9V, and having light for this car, with of course a on/off switch. Oh, and I added something underneath the car also. You just need to guess what it is. Blade. EDIT. : I am thinking of redoing the front Arches into more of a square like to appeal more the the rear on how it meets with the door. Just before the door though, make it so it's a little "boxed" like instead of being rounded, but in the front keep the rounded Arch look, just flow into the bit a little better? If that makes any sense... If it doesn't just look at the rear Quarter Panel, and just place it infront of the mirror(imagination time.) but keeping the front round part. Last edited by Blade.; 11-11-2009 at 01:28 AM..
|
|
#57
01-24-2010, 10:52 PM
|
|||
|
|||
|
-Update soon to come-
This is just a words update, as my phone(camera) is currently not working. I have recently created a custom spoiler out of 1.0 styrene sheeting, it's a lip spoiler and the holes for the spoiler(Skyline) shown in some posts has been rid of. Brakes are painted, calipers as well. Thinking of painting the chassis also. Pictures soon though eh? Blade.
|
|
#59
03-21-2010, 03:43 PM
|
||||
|
||||
|
looks good but still needs alot of sanding done.
Also that paint looks abit think in places, remember to use primer before colour and take your time.
|
|
#60
03-21-2010, 09:34 PM
|
|||
|
|||
|
It sure is coming along. Your dedication to the project says alot. You are working through the obstacles as they come.
I like it.
__________________
Don't be a troll.
|
 |
| Currently Active Users Viewing This Thread: 1 (0 members and 1 guests) | |
|
|


 Linear Mode

