

|
|
#1
|
||||
|
||||
|
I found a great way to cut out the grill on a bodykit without wrecking the stock paint job and decided that I should share this with the rest of you. The results have been really good for me and I hope they will turn out great for you.
Disclaimer: If you wreck a body or bodykit, I take no responsibility! I decided to use the Wild front clip from an RSX for this tutorial, though you can use whatever body and body style you would like. Alright, lets get started! Step 1: You are going to need a few things to make this work. - a Dremel should be required, because it makes this work really well. If you are skilled with a knife, you could try this technique, but I won't guarantee good results. - a cutting bit, and drill bit for aforementioned Dremel - a hobby file (1 round side, 1 flat side) or dull exacto knife - safety glasses (safety first!) - some type of hobby glue (clear drying is best) - some screen of your choice - piece of xmods body  Step two: Identify the places you will be cutting out. You are only going to want to cut out the parts of the body work that would be cut out in the real body work. Freehand cutting, or cutting out where there is no cut out will give you less than desirable results. 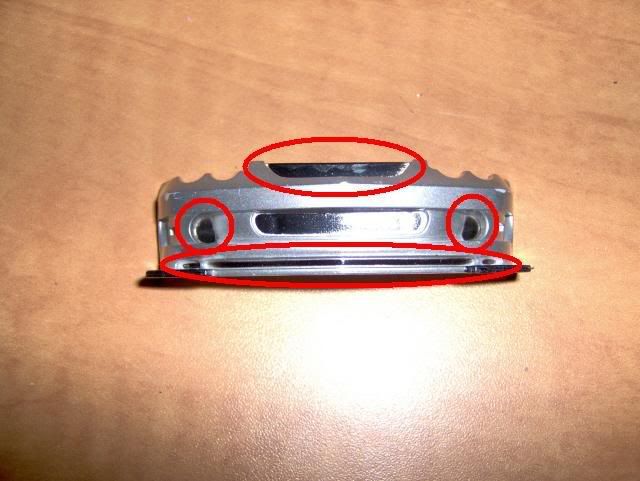 Here you can see 4 spots that can be cut out, this is what we will be doing. 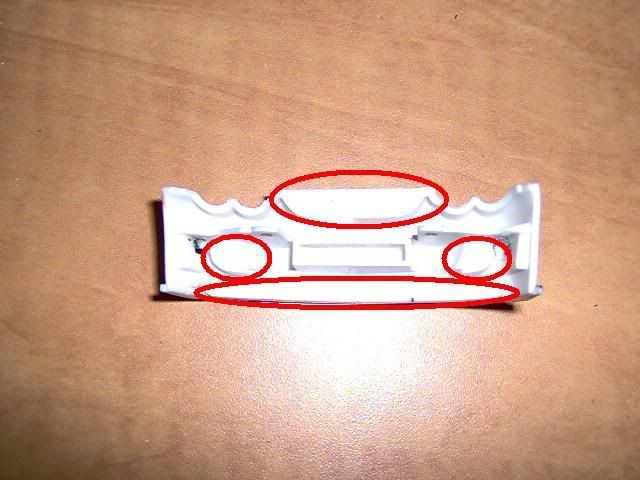 From the back you can see where the work, or cutting will take place. We will only be cutting the raised palstic from the back as this gives the best results. Cutting from the front will likely damage your body. Step 3: You will begin cutting out the area shown above with your Dremel (with cutting tool) by starting on the outside, taking off a small strip all the way around the edge, do 2 or 3 passes. Take your time and go slow, this is VERY important to good overall results. Next start working down the middle of the area you are working on, leveling it out with outside edge. It should like this: 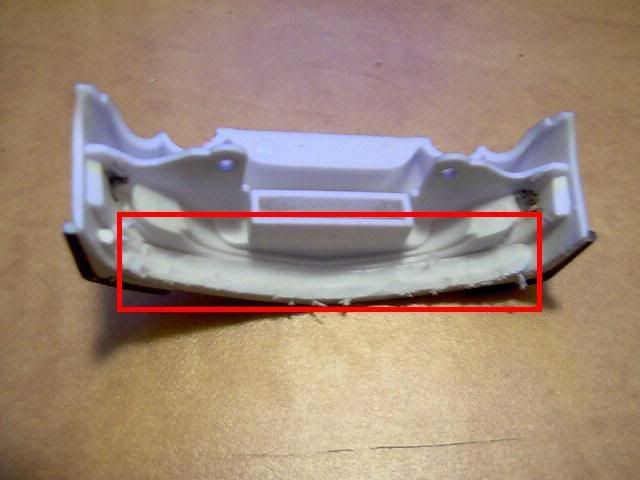 Step 4: Keep cutting down the area you are working on SLOWLY, taking off only a little at a time. Start from the outside and then level off the inside. You will need to do this a few times, and eventually the area will start to show a dark area in the middle of where you are cutting, this is because the plastic is now very thin and you can see light coming through the other side. It should like something like this: 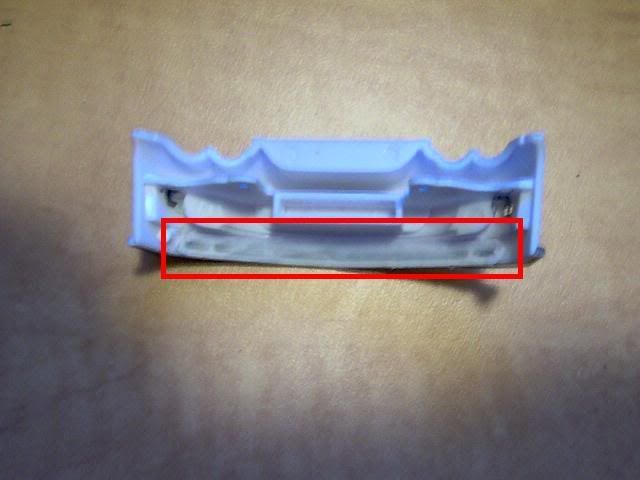 Step 5: Now you are going to take your dremel and work the outside edge of the the area you are cutting out very slowly, taking off only a small amount of material at a time. You will start to see the darkened middle area come away from the rest of the body, which is exactly what we want. Just go slow and you will get nice results. It should look like this after this step: 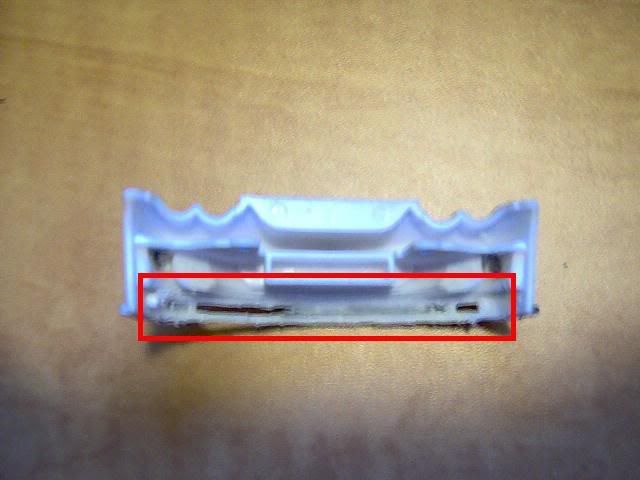 Step 6: WORK FROM THE BACKSIDE Now take your hobby file and clean out your cut, being careful not to damage the paint on the body. I find that using the sharp edge of the file works great for taking extra bits of plastic off the body, just hold it an angle and drag it along the cutout to clean it up. You can also use a dull exacto or hobby knife, just make sure that the knife is leaning in the direction you are pulling it. If you pull the knife with the edge in the direction you are pulling, you risk cutting off excess plastic which may ruin the overall look of your work. This is what it should like when you are done: 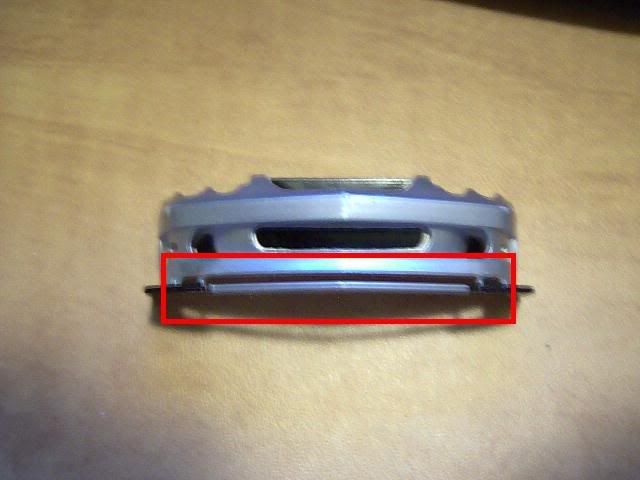 Note that there are not any excess pieces or shavings of plastic visable through the cutout, this is the look you are going for right? Step 7: Now go and repeat steps 3-7 for all the areas you identified in step 2 that you want to cut out. My finished piece looks like this: 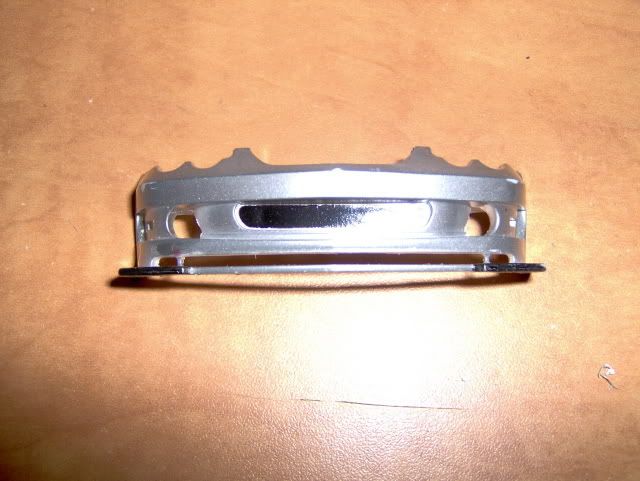 Step Eight: Drilling out holes for your fog lamps. For best results, you will want to put them in a place where fog lights would normally go, near the bottom and off to the sides. You will want to use a drill bit that is roughly the same size as the LED lights you are using, that way, they just slide right in. Be careful when you drill out the holes, make sure you have a nice flat surface to start from when you cut out, you may even want to start a guide hole using a knife or something like that. Again this will be done from the back for best results. Here you can see the finished product and appropriate placing of holes: 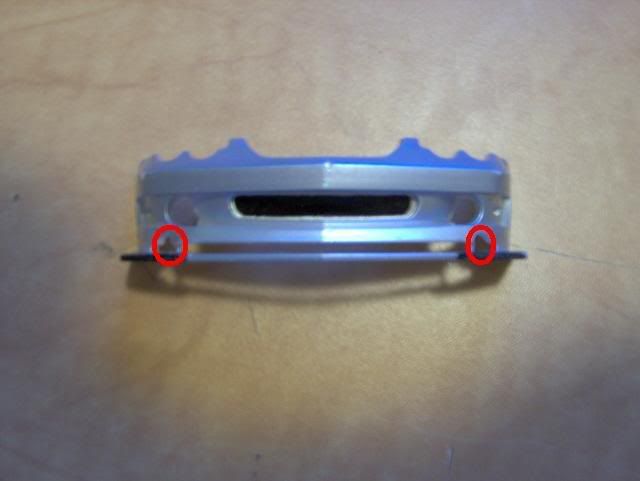 Step 9: Now you are going to take your screen and cut it to the appropriate sizes and shapes and glue it over the backs of the body work. Put glue on the body first (use a little at a time! too much makes for a sloppy finish) and then place the screen onto the glue, apply a slight pressure until the glue comes through the screen. Let the glue dry fully. It may not have bonded all the way around, so now take more glue and glue down all the parts that didnt adhere the first time. Let the glue dry fully. Once all the edges are glued down, make one final pass with the glue all around the edge of the cutout to totally secure it in place. I don't have a picture of this as I won't be using the piece I used on a car and this step takes some time. I know you will figure it out! Here is a mock-up of the completed setup, hope your work turns out great! 
__________________
Mine's faster! My for sale thread: NEW!! Check out recent discounts and special offers! THE EDJ'S FOR SALE THREAD Last edited by THE EDJ; 01-16-2007 at 11:29 PM.. |
| Currently Active Users Viewing This Thread: 1 (0 members and 1 guests) | |
|
|